Making Craftel evaluation kit v9
8.Installing purey
9.Making Legs
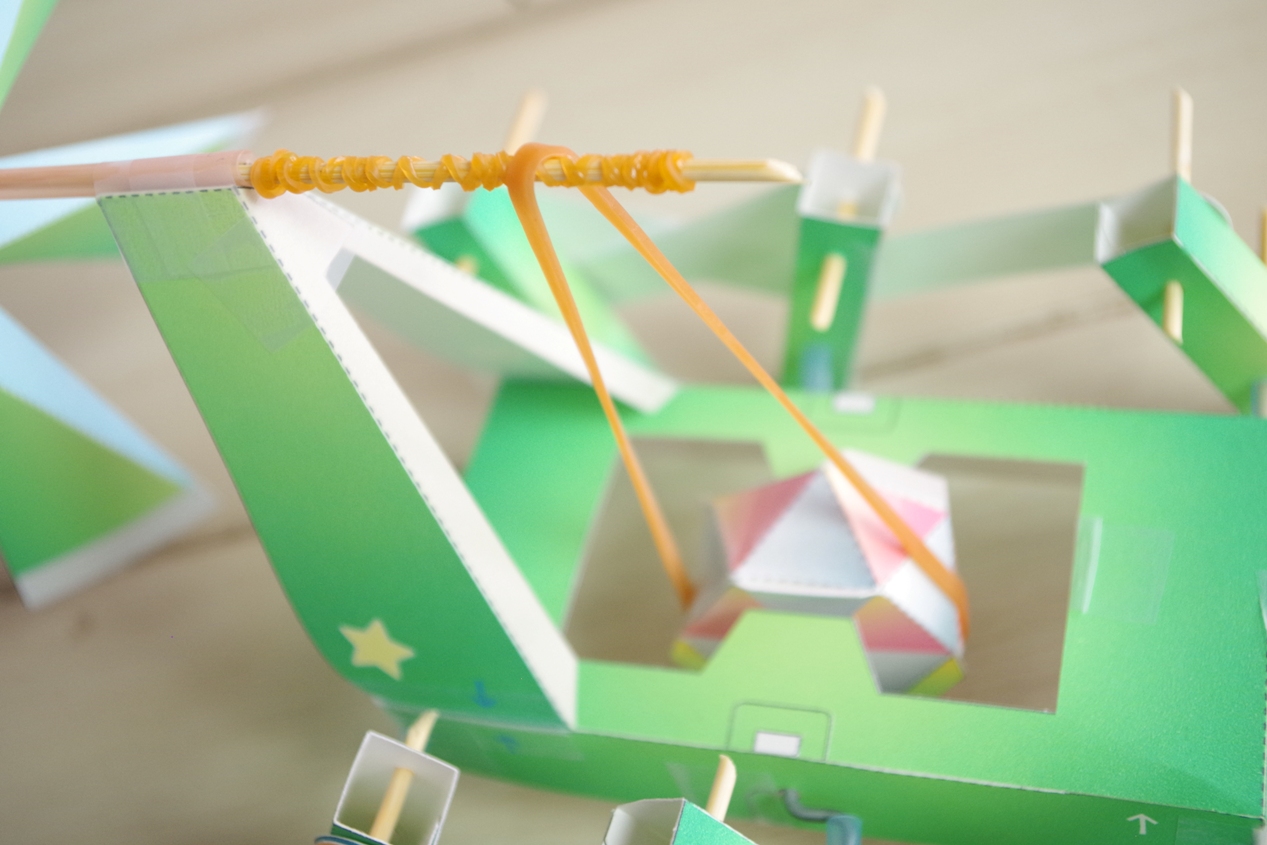
8. Installing purey
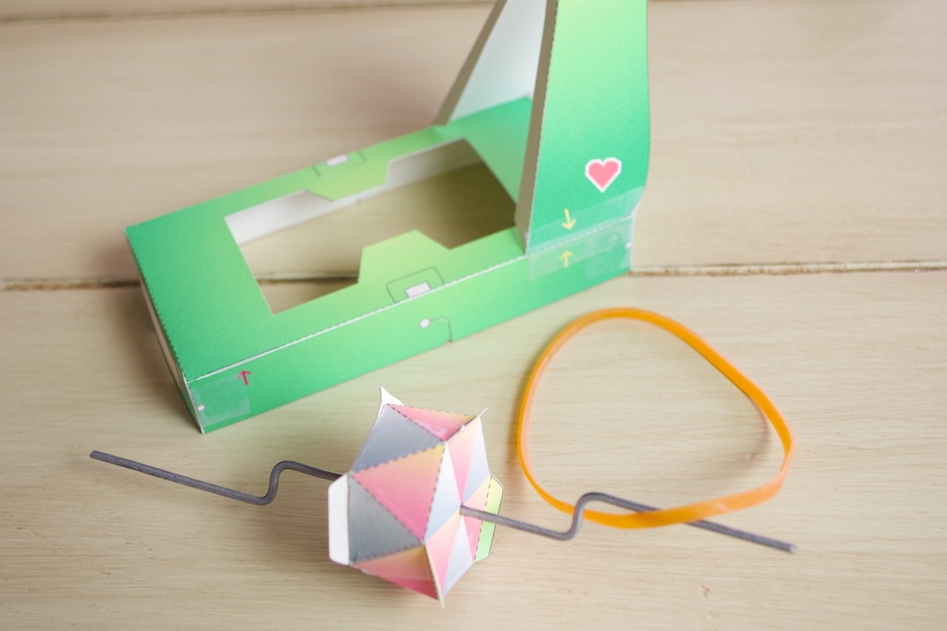
1.Prepare chasis, purey, rubber band (large)
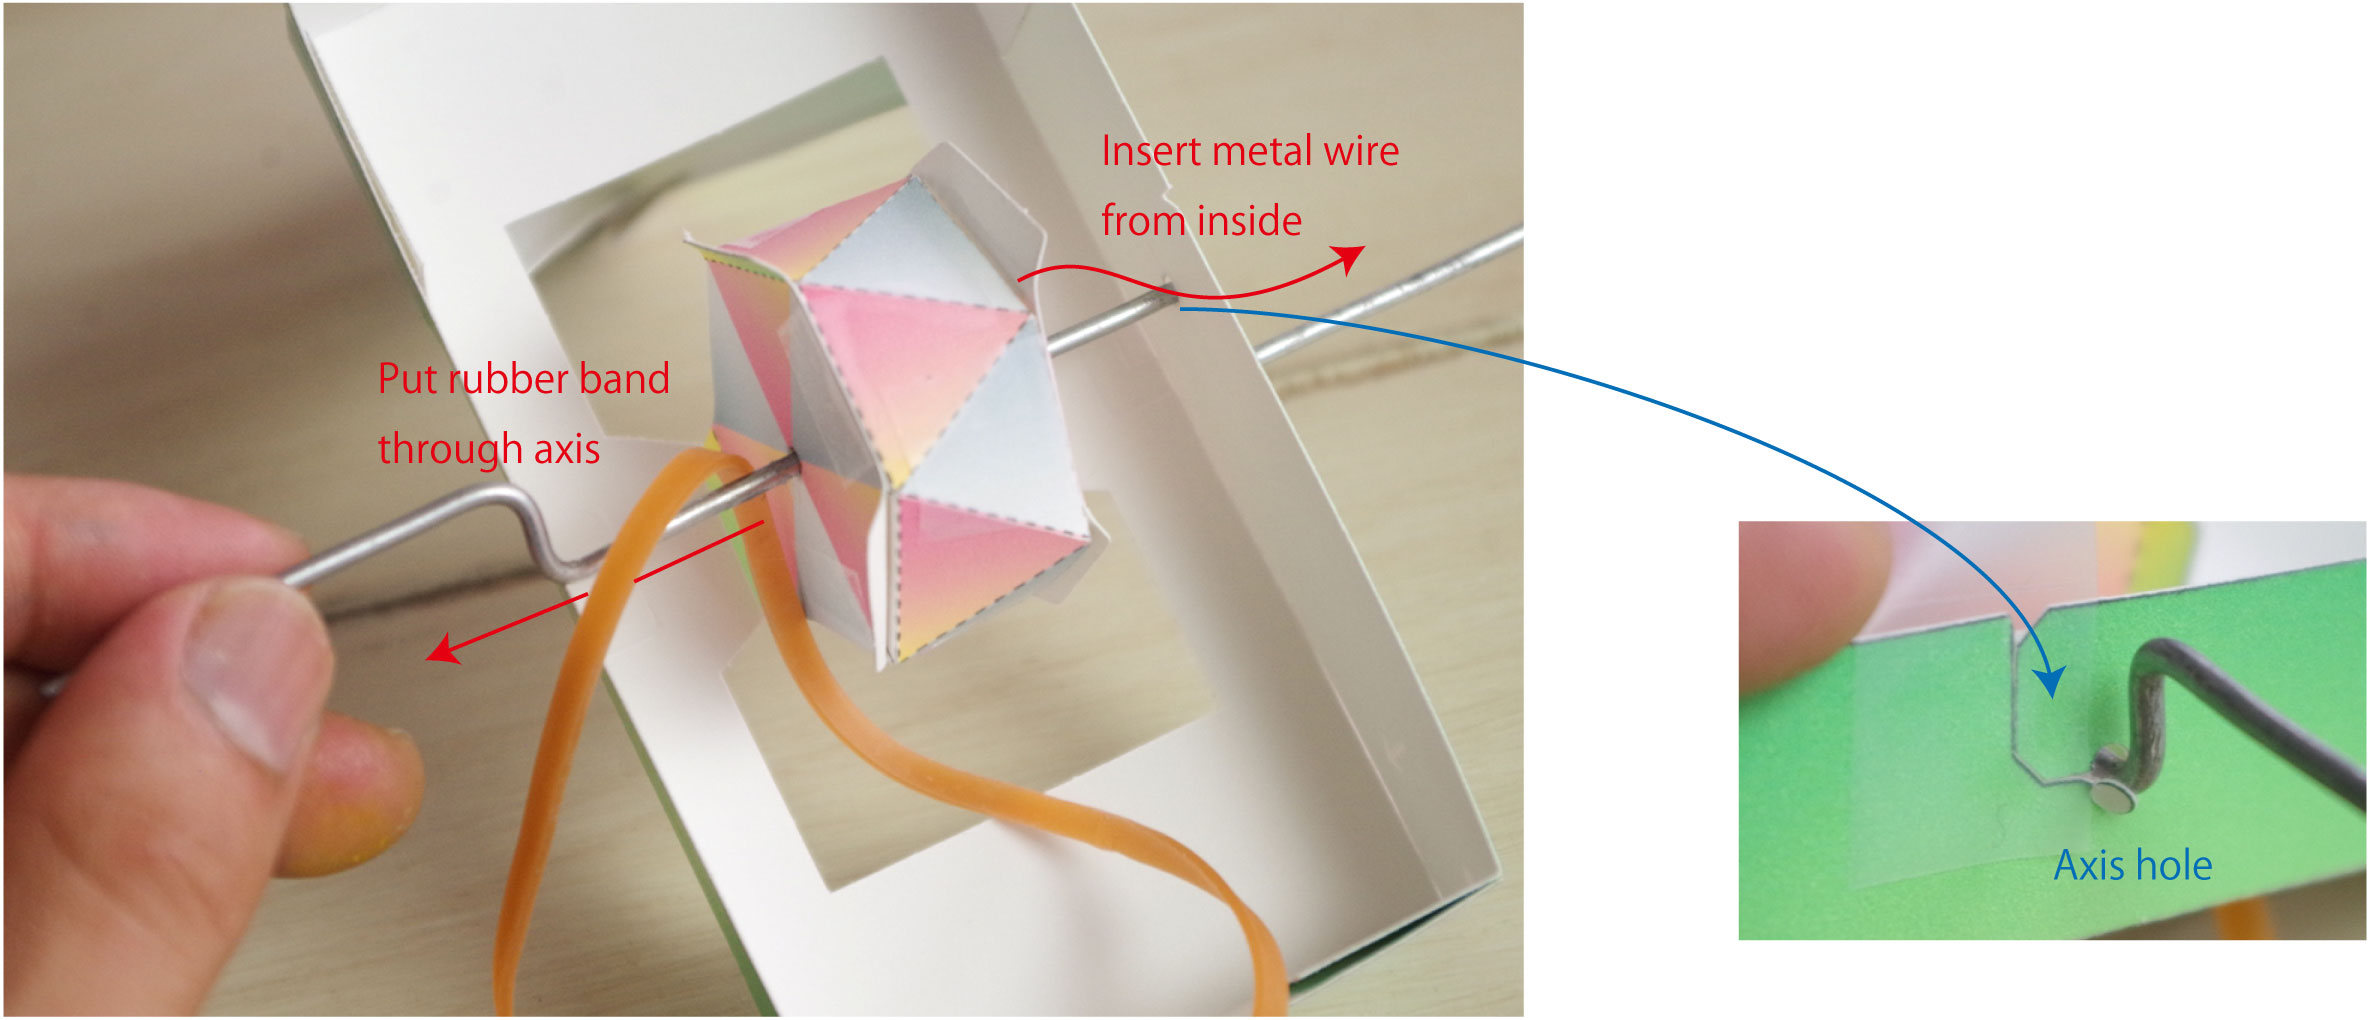
2. Put rubber band (large) through the metal wire axis
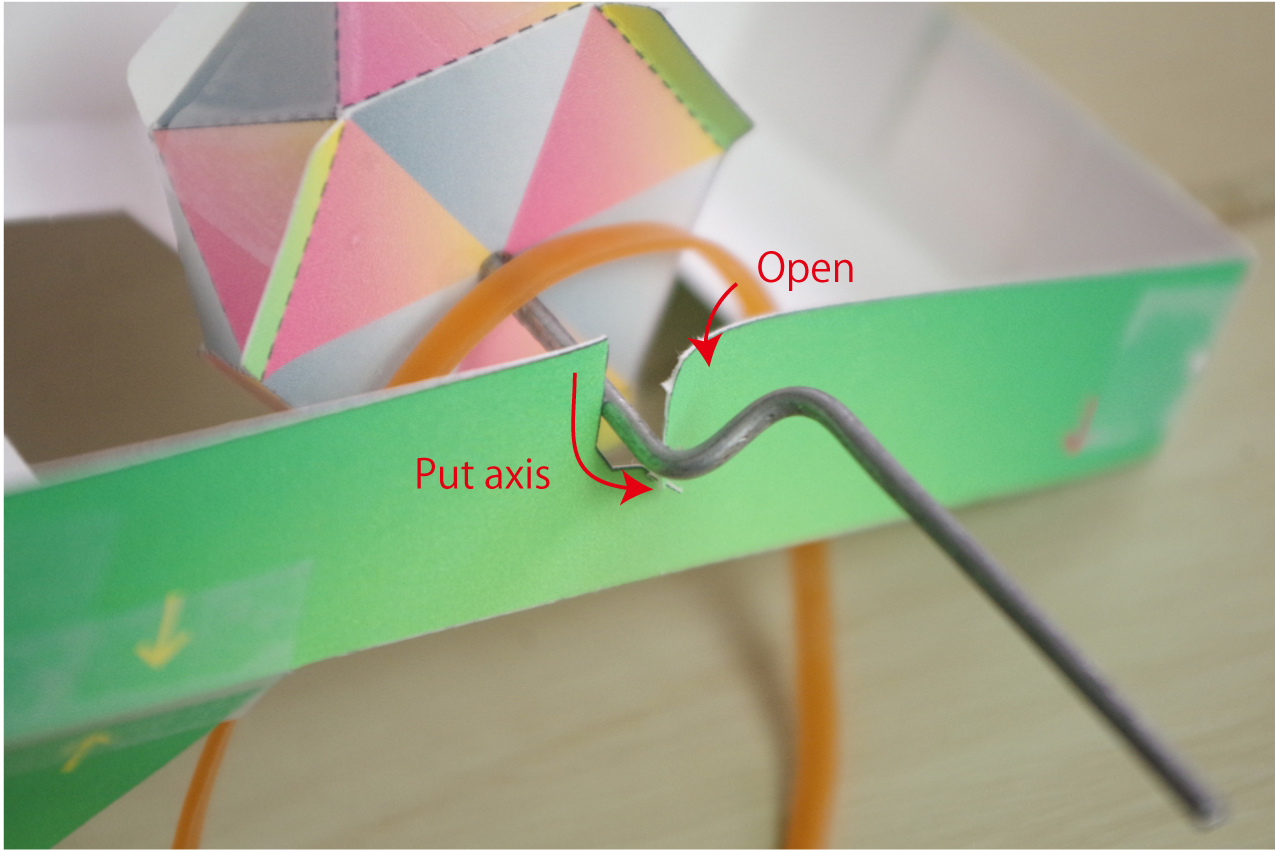
3. Put the other side axis
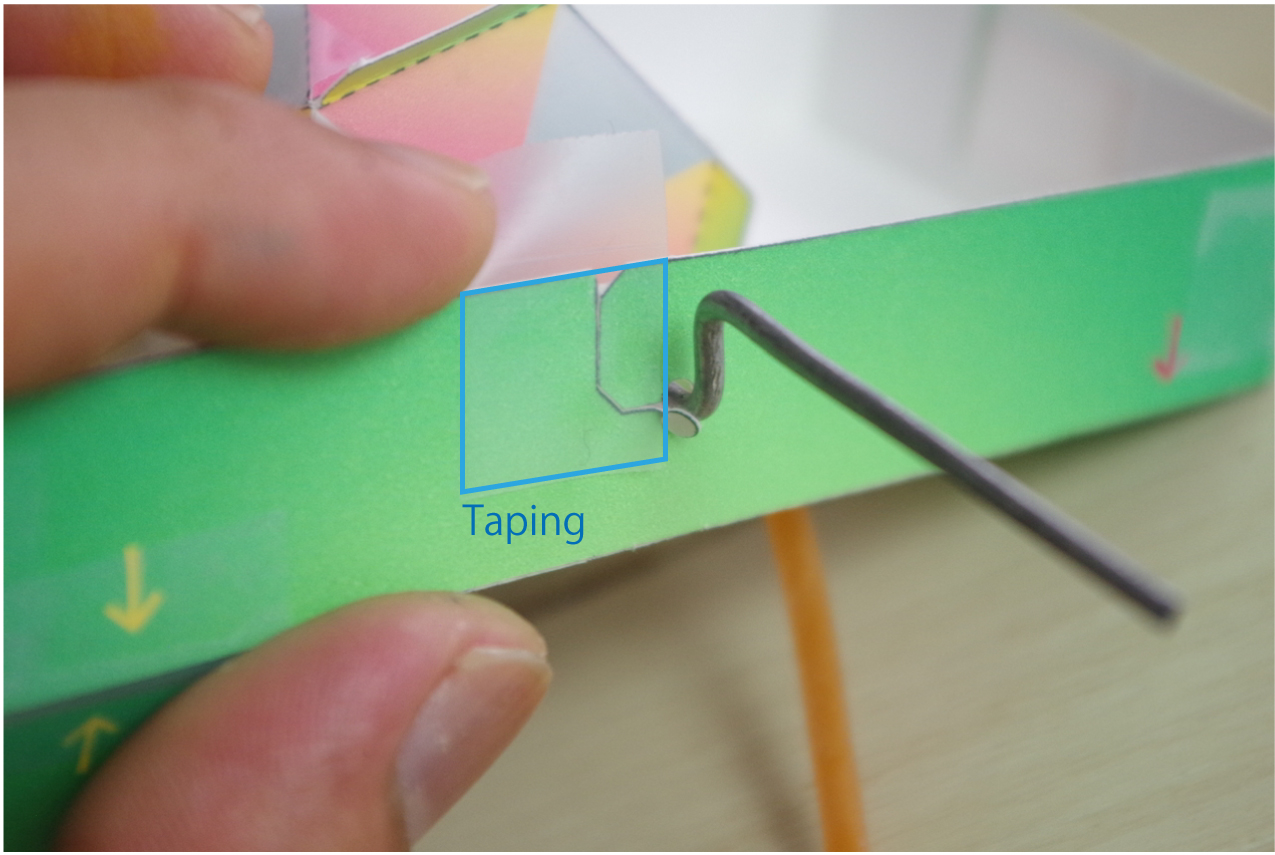
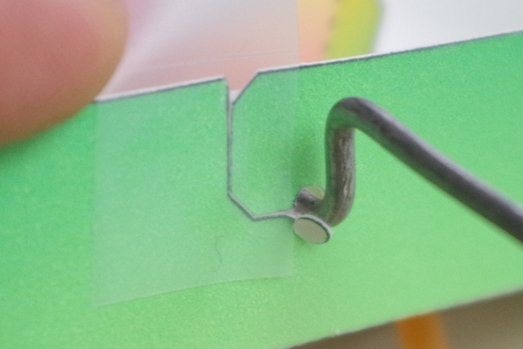
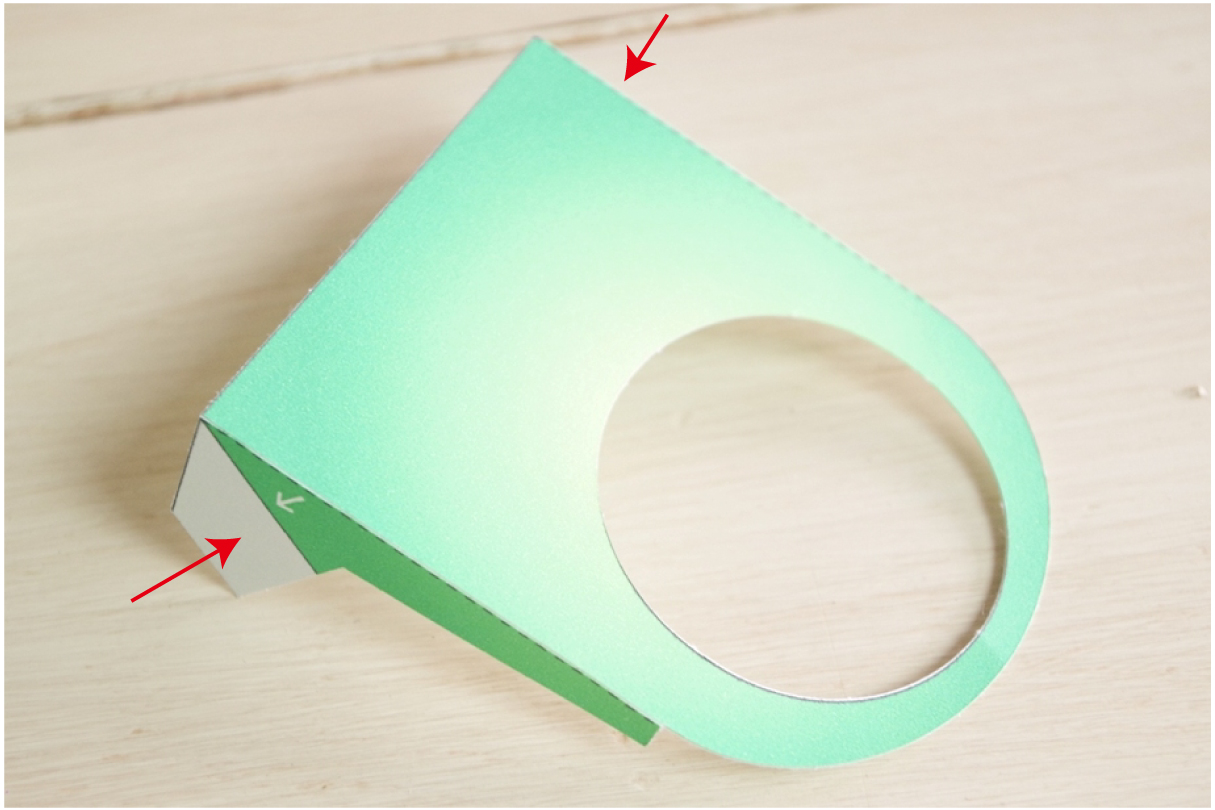
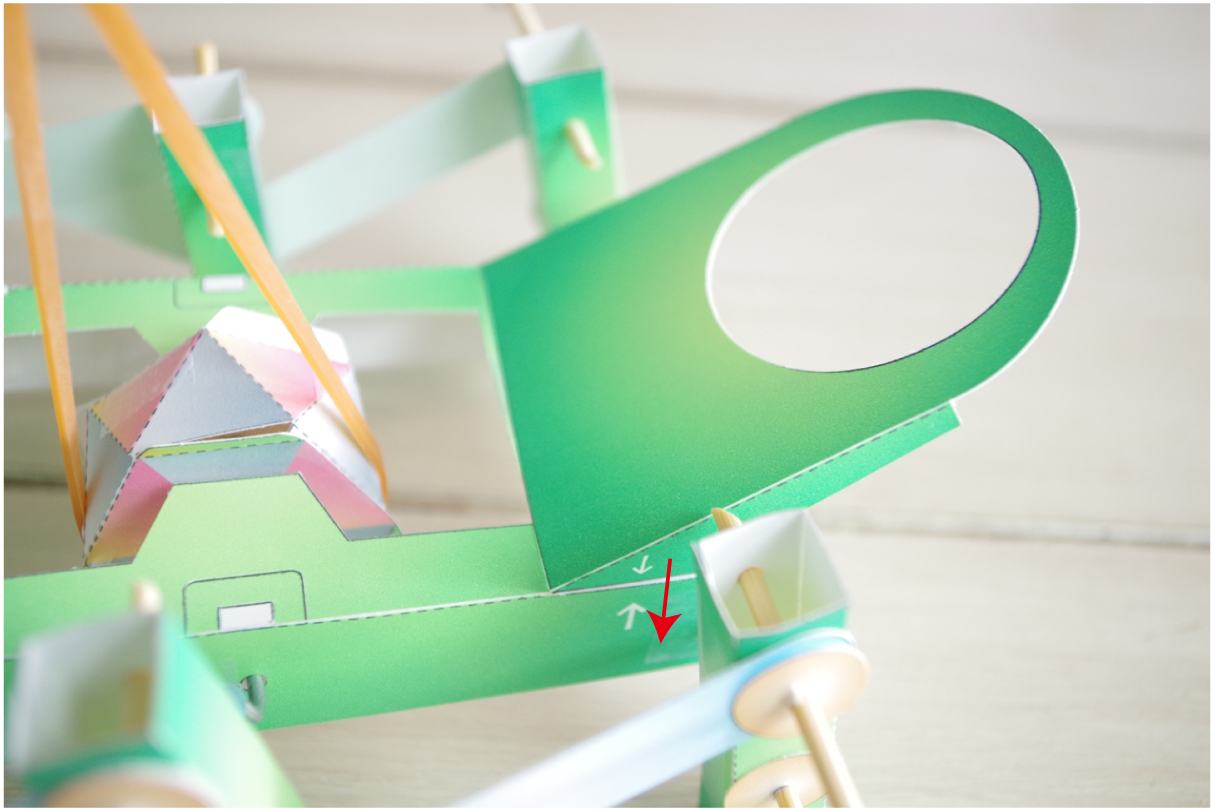
5. Tape to the cut line
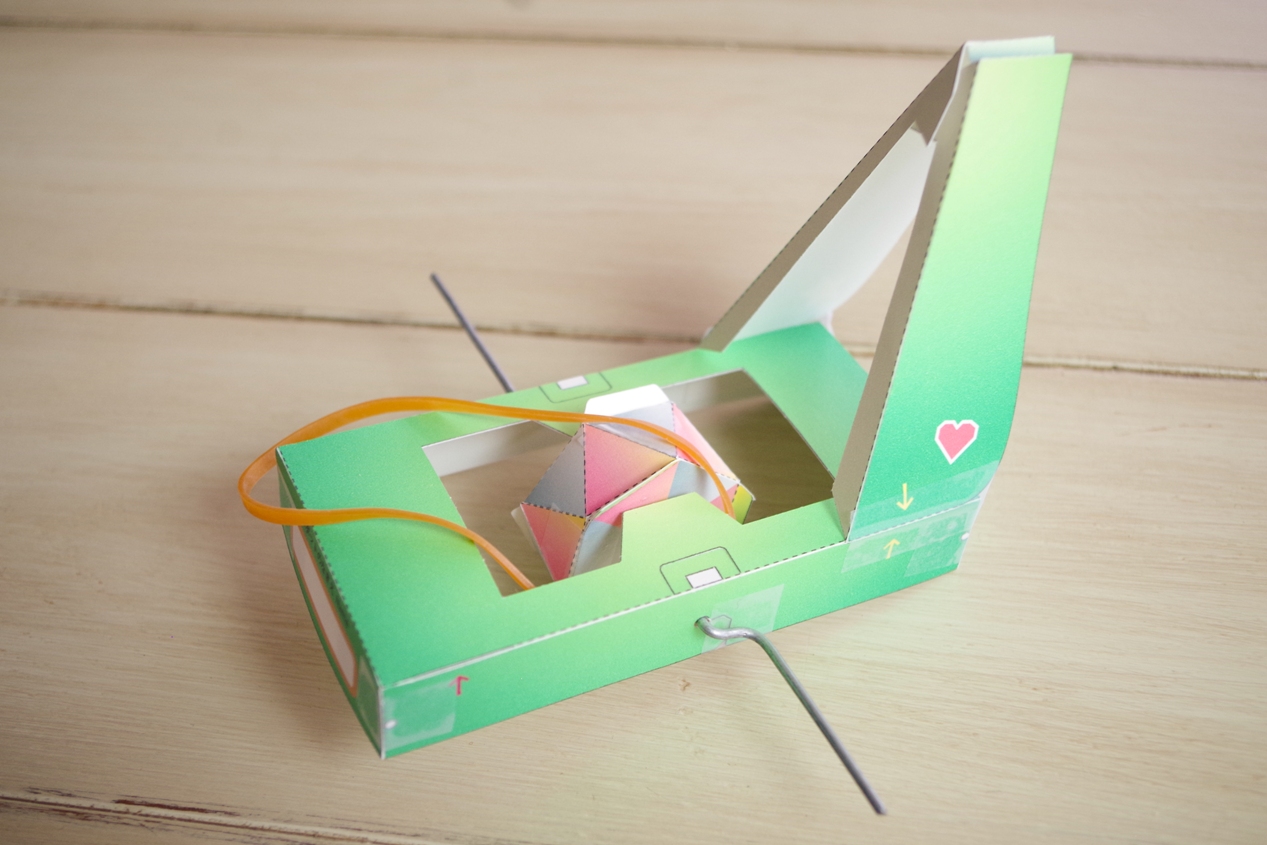
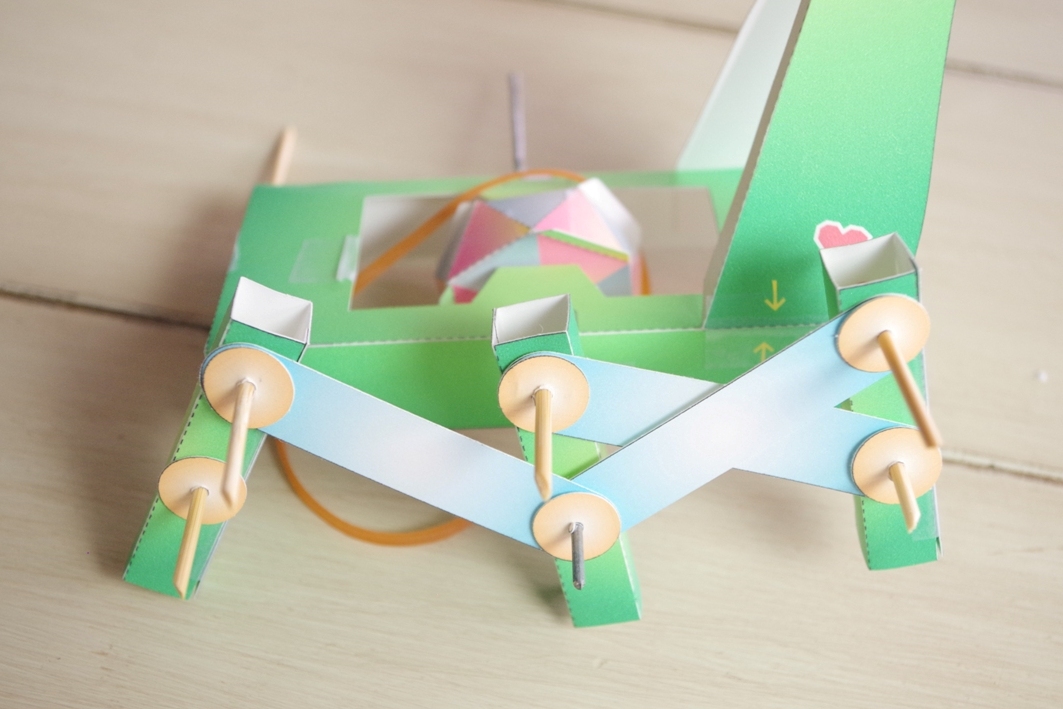
4. If correct, it will be like this. Please check the purey will turn smoothly or not. If not, please check the axis.
9. Making legs
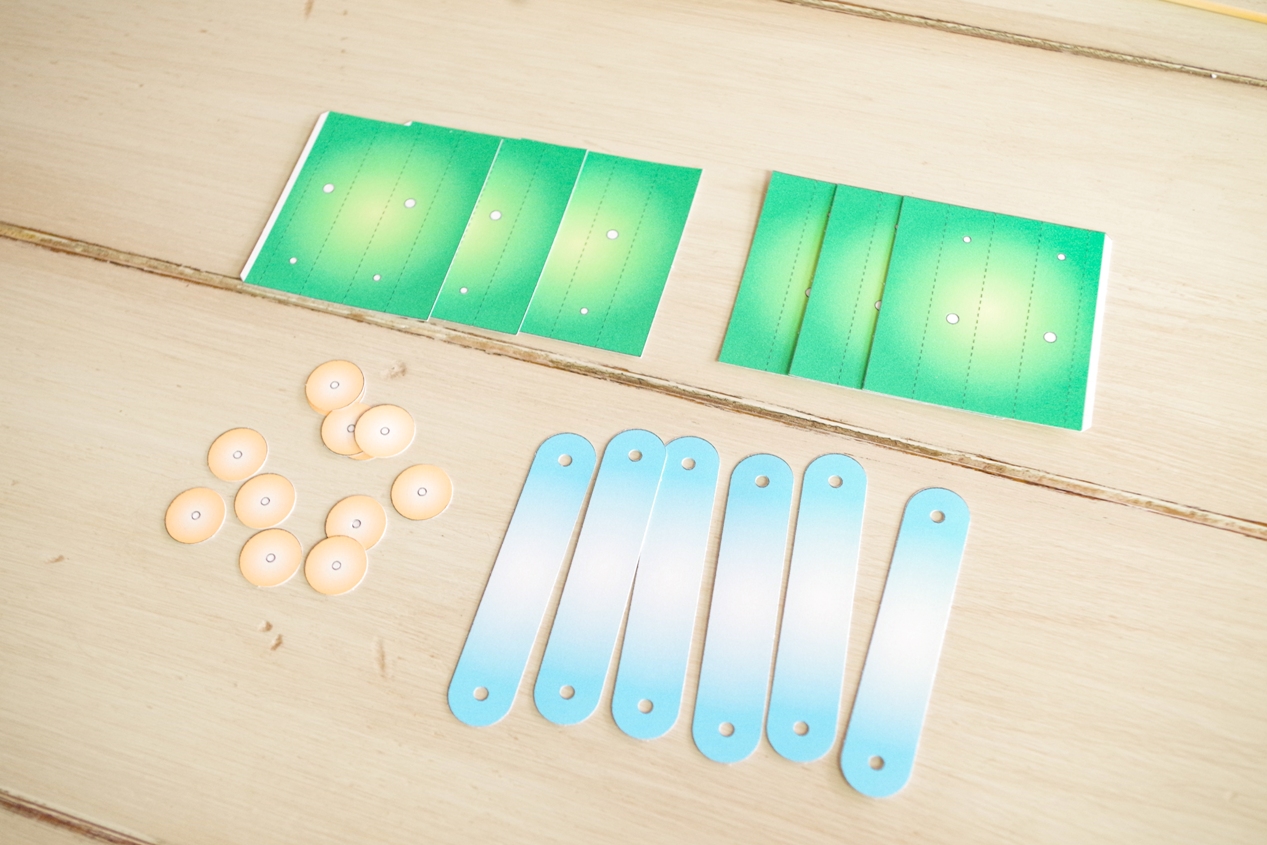
1. Cut D-1, D-2 and D-3
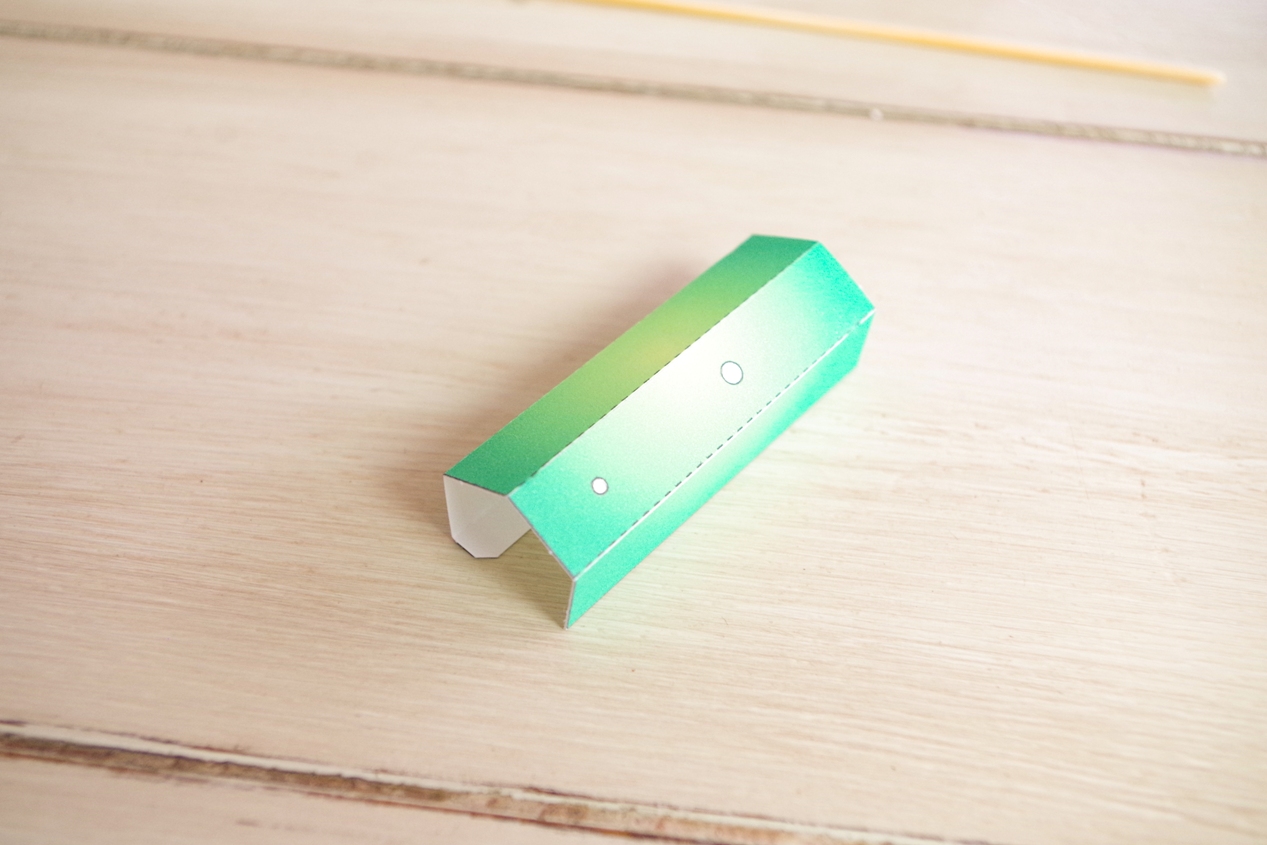
2. Fold D-1
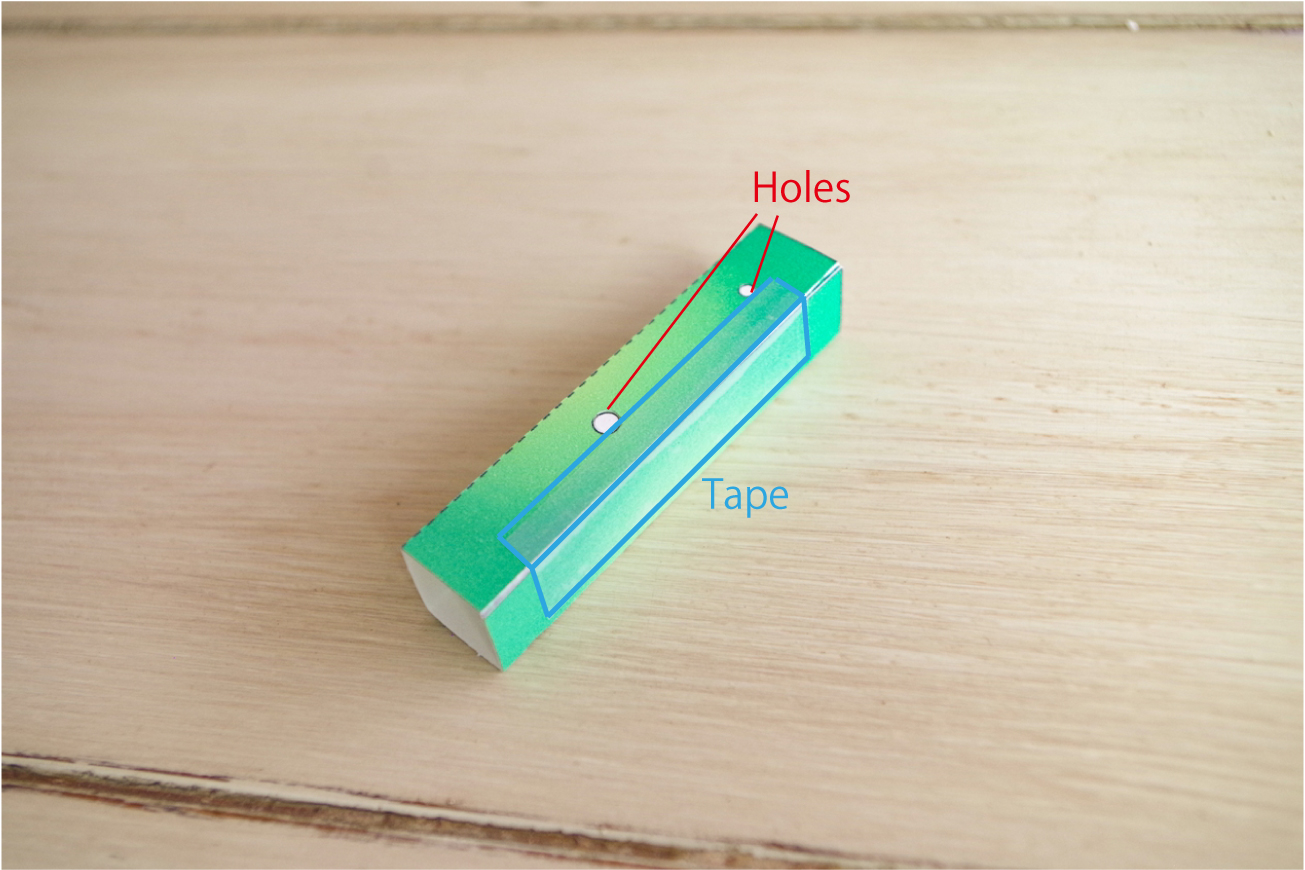
3. Put tape (please don't put tape on the holes)
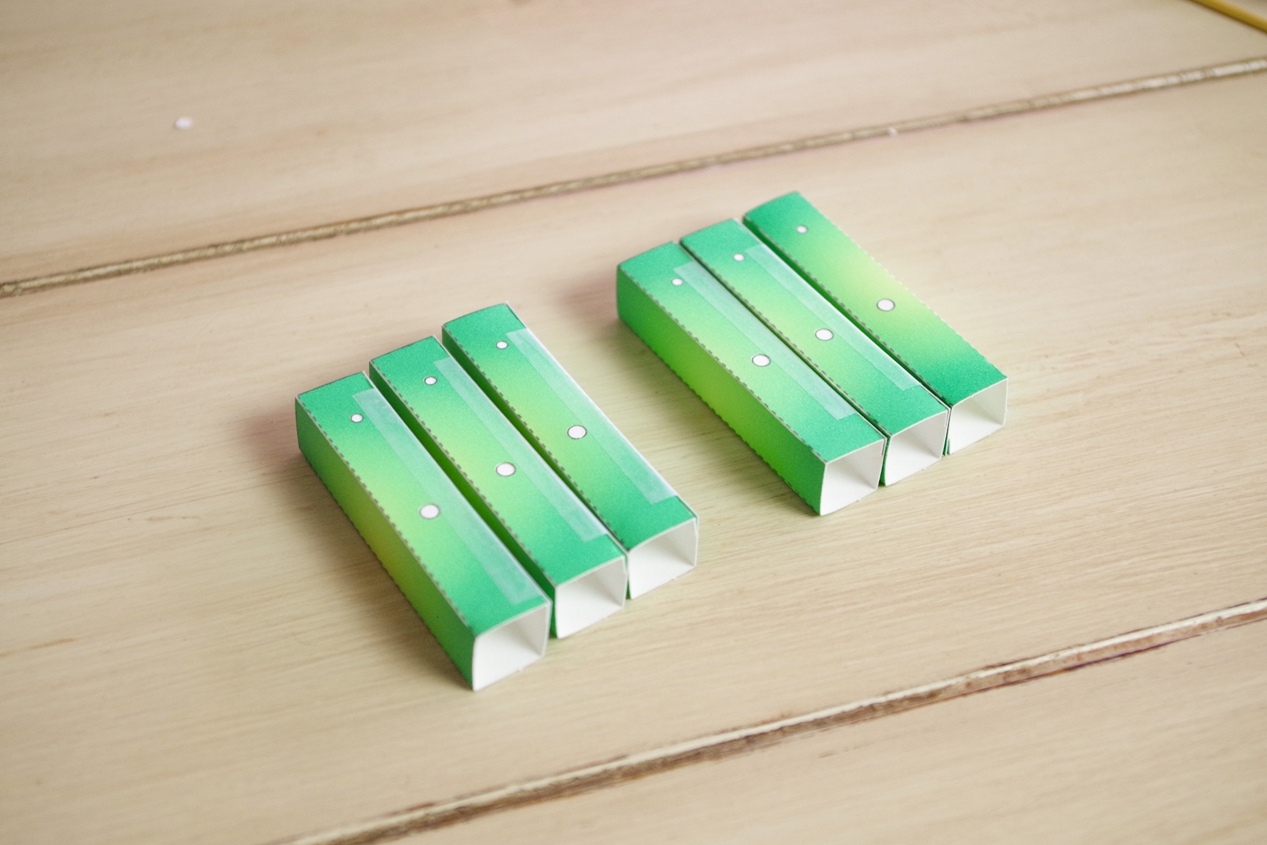
4. Make 6 legs by same way
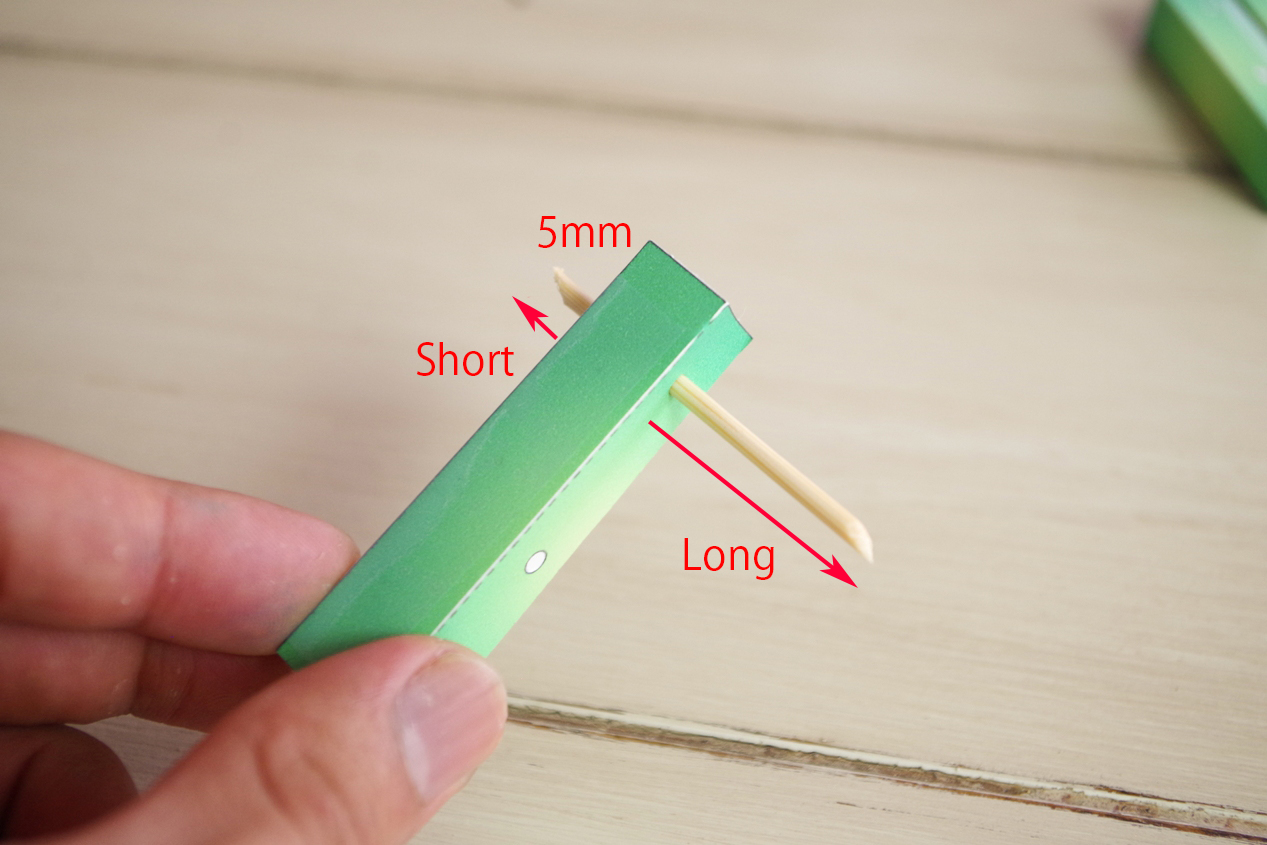
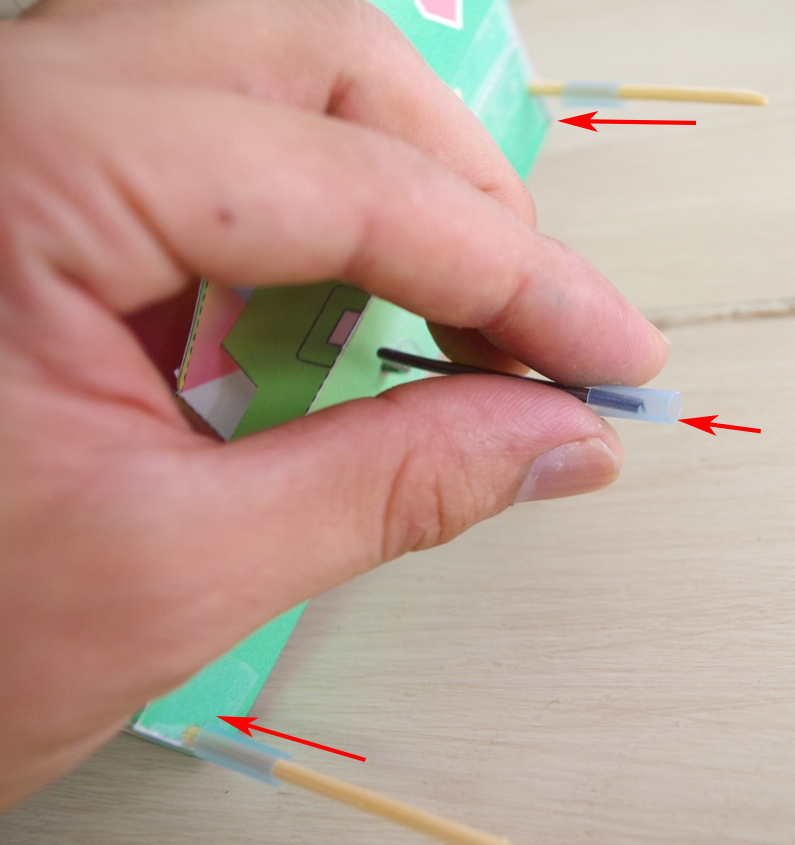
5. Insert skewer(short) to the legs like this
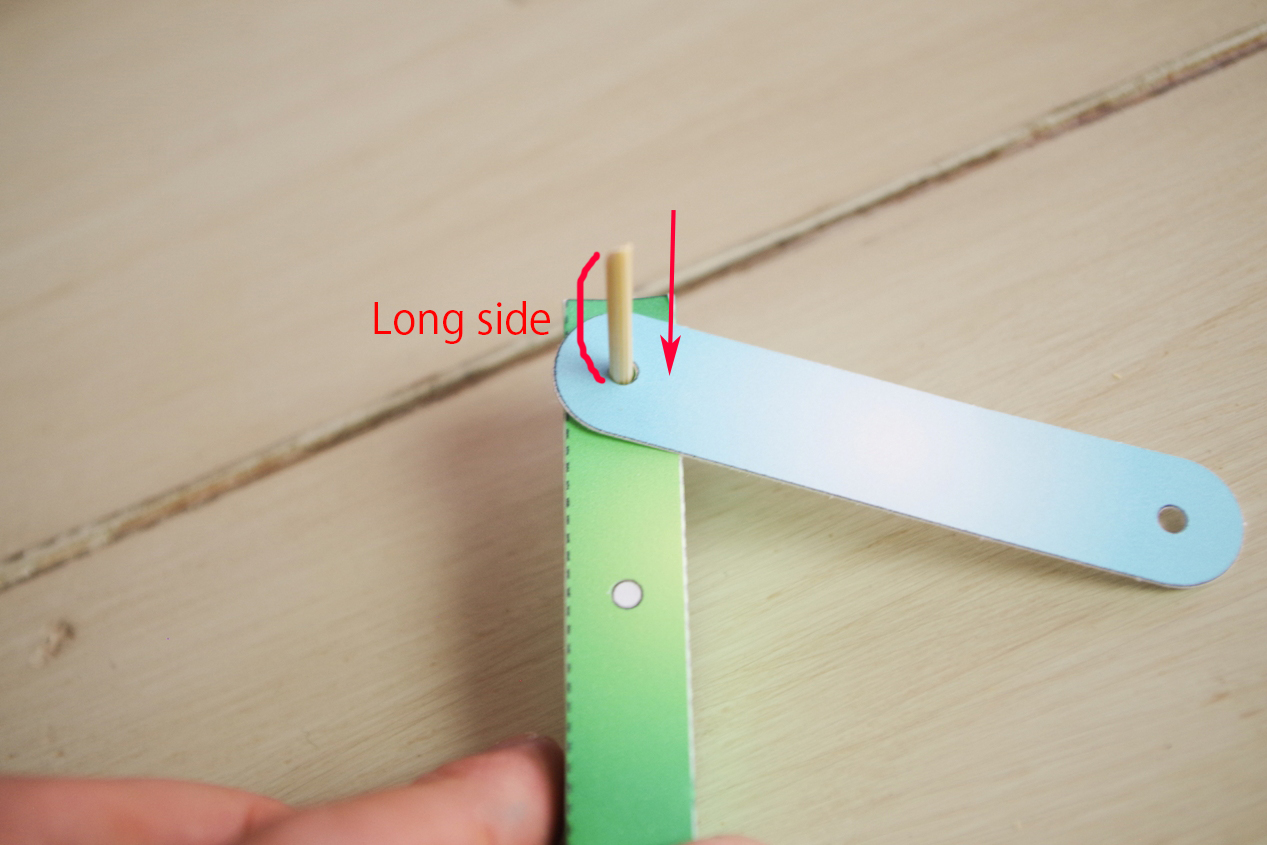
6. Put D-2 to the skewer
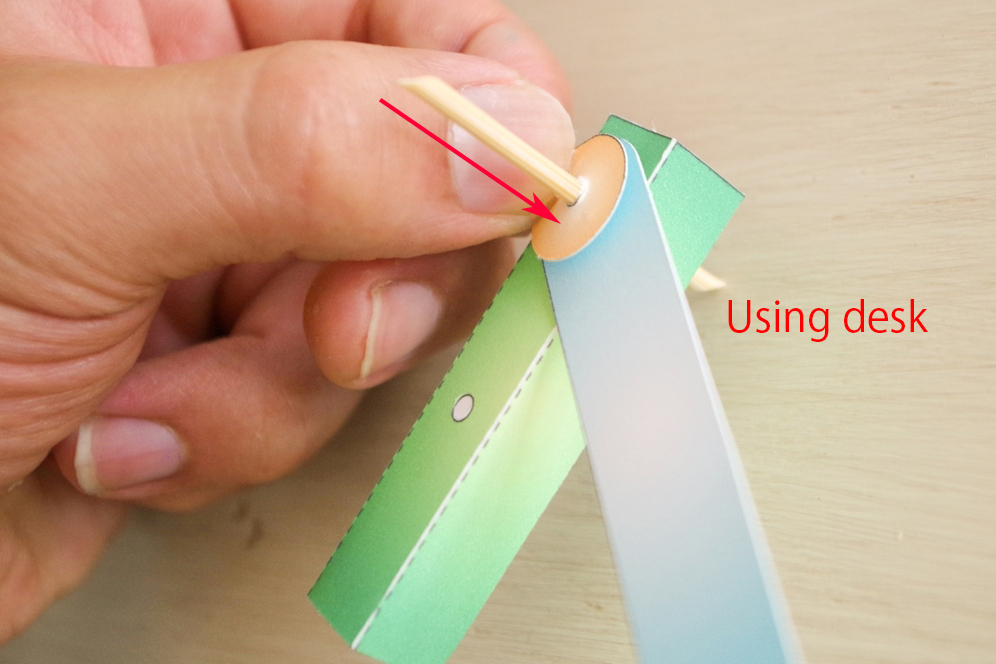

7. Put D-3 to the skewer
It will be easy to putting if using desk like this
8. Make 6 legs by same way
10. Installing legs
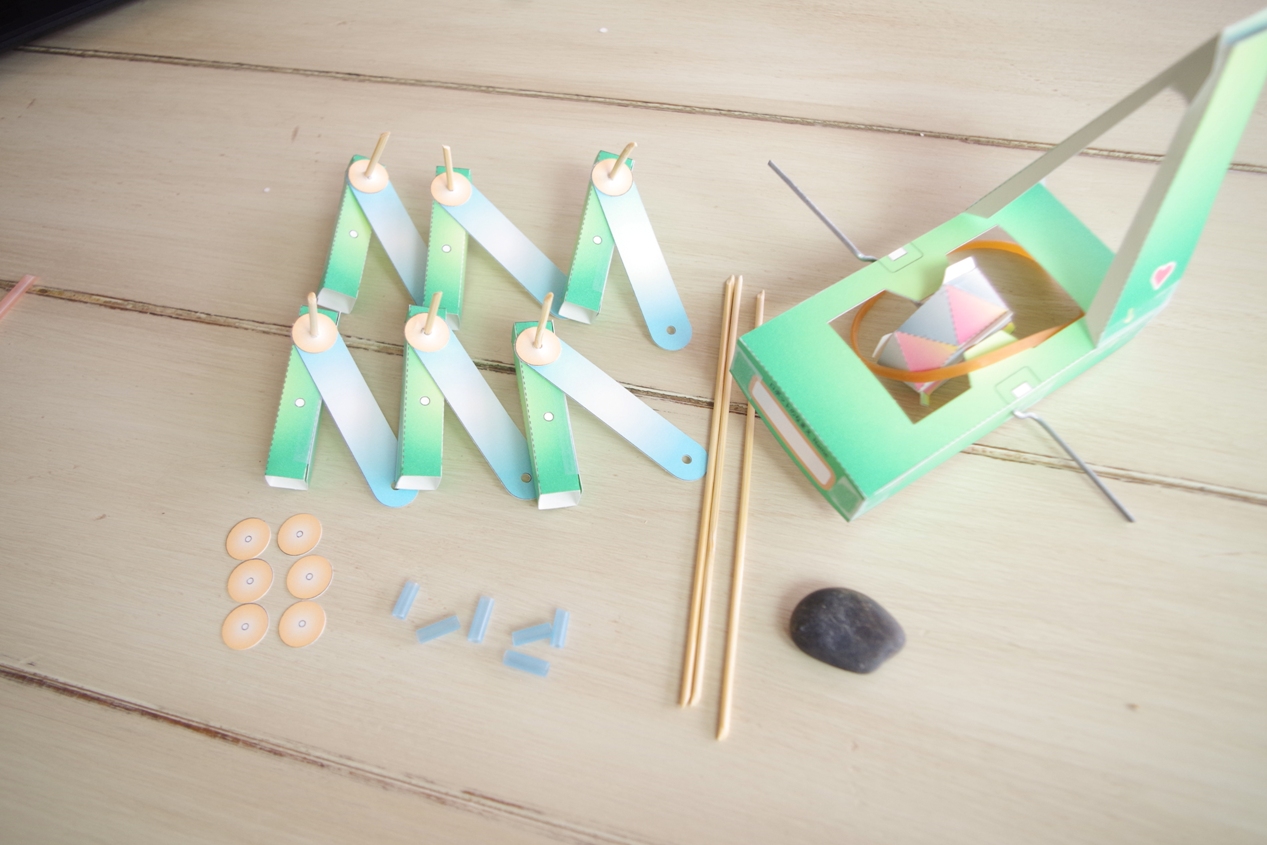

1. Preparing
2. Insert skewer to the chasis (Front and rear)
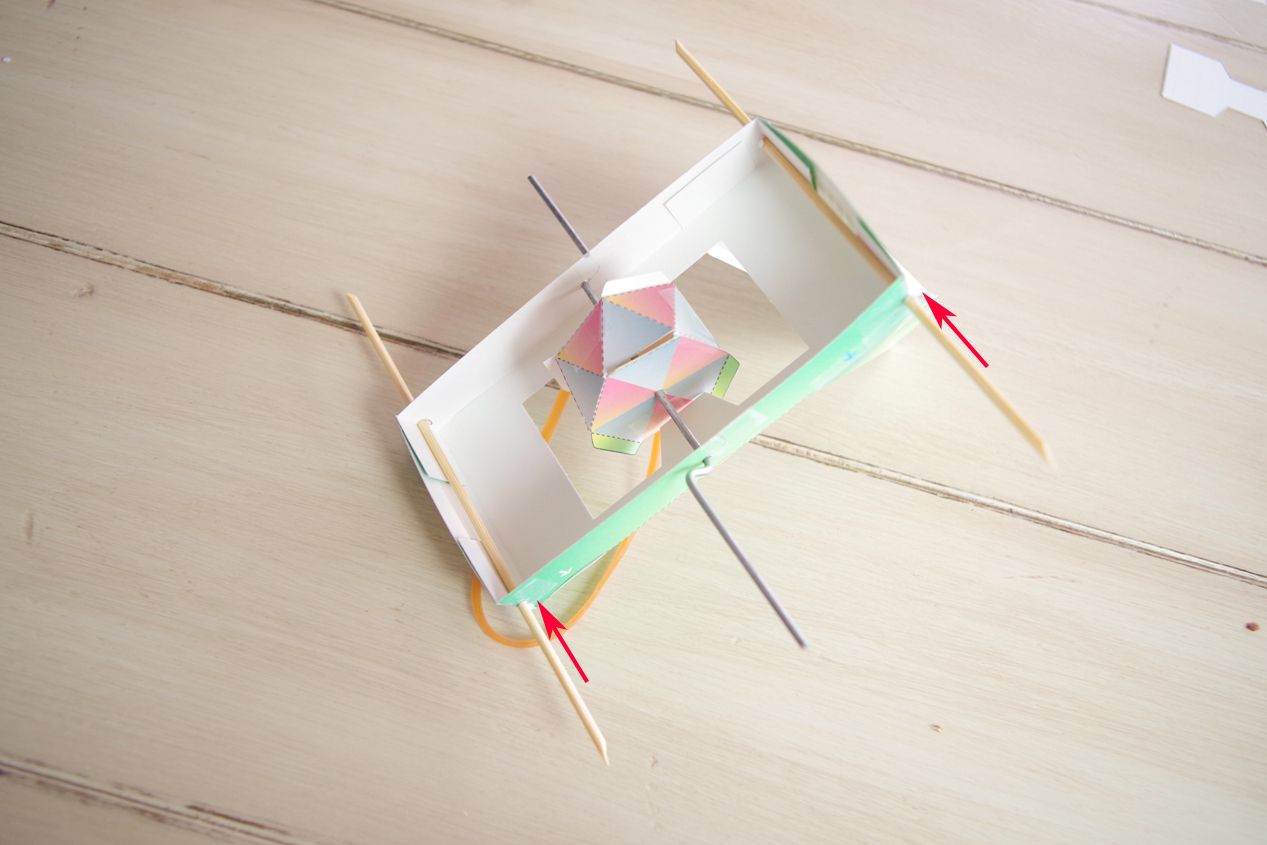
3. Will be like this
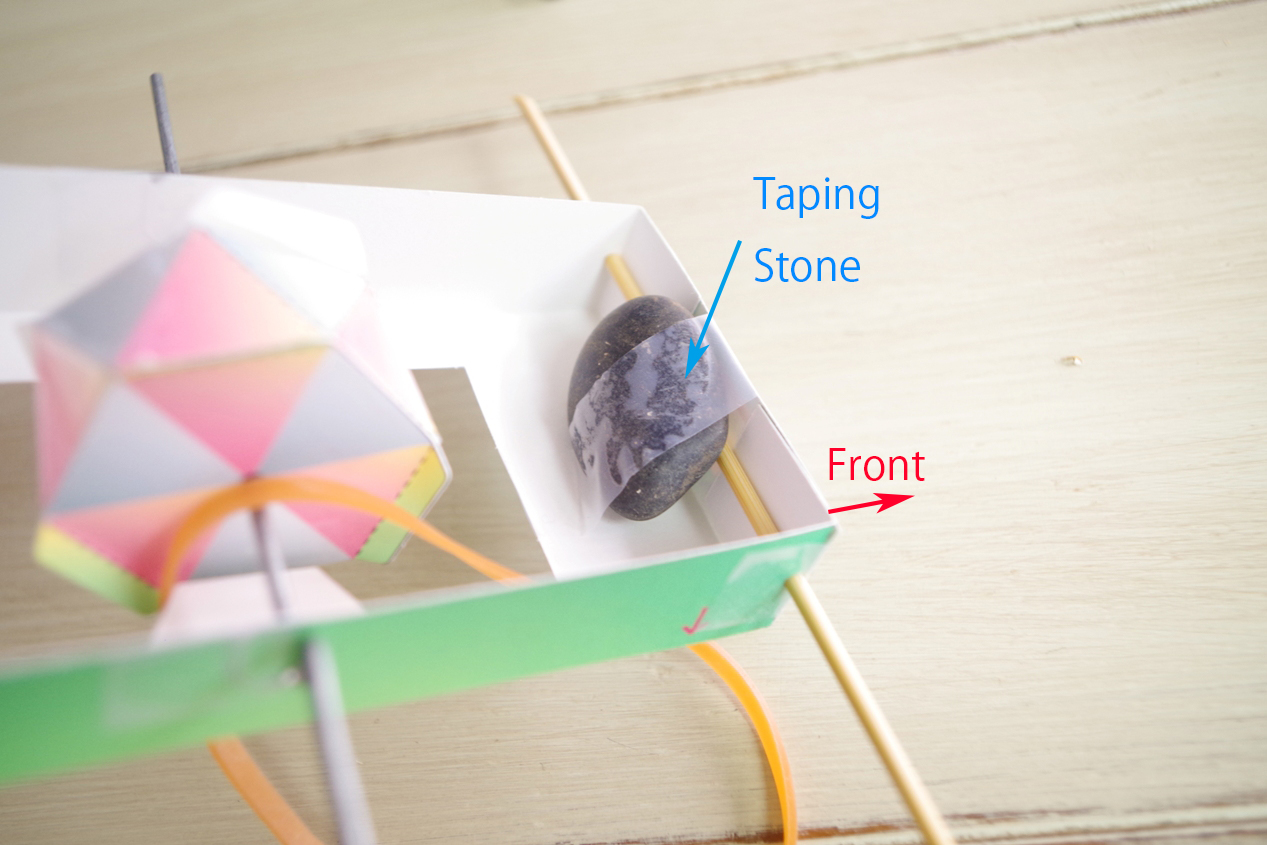
4.Taping stone as a weight (option)
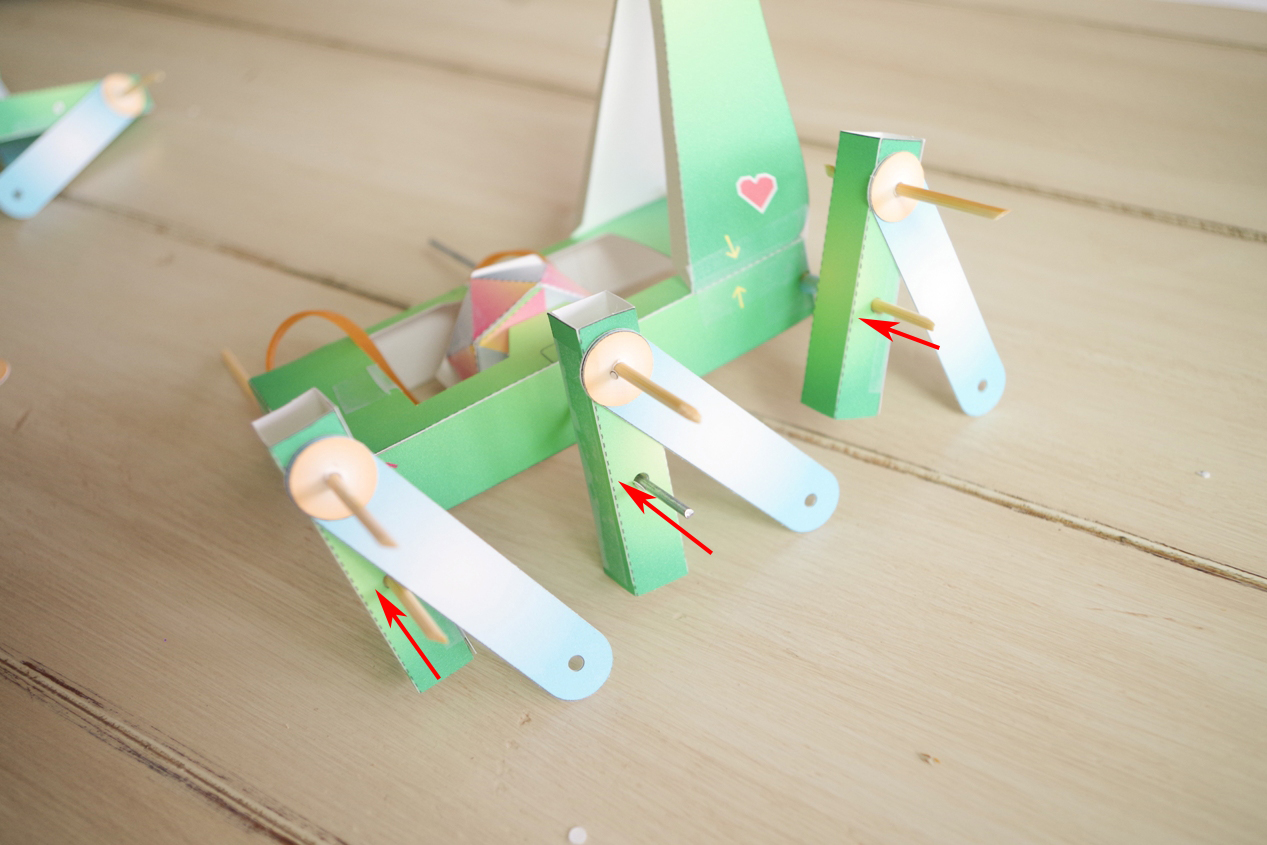
6. Install legs to each axis
5. Put straws (short) to the left side's each 3 axis
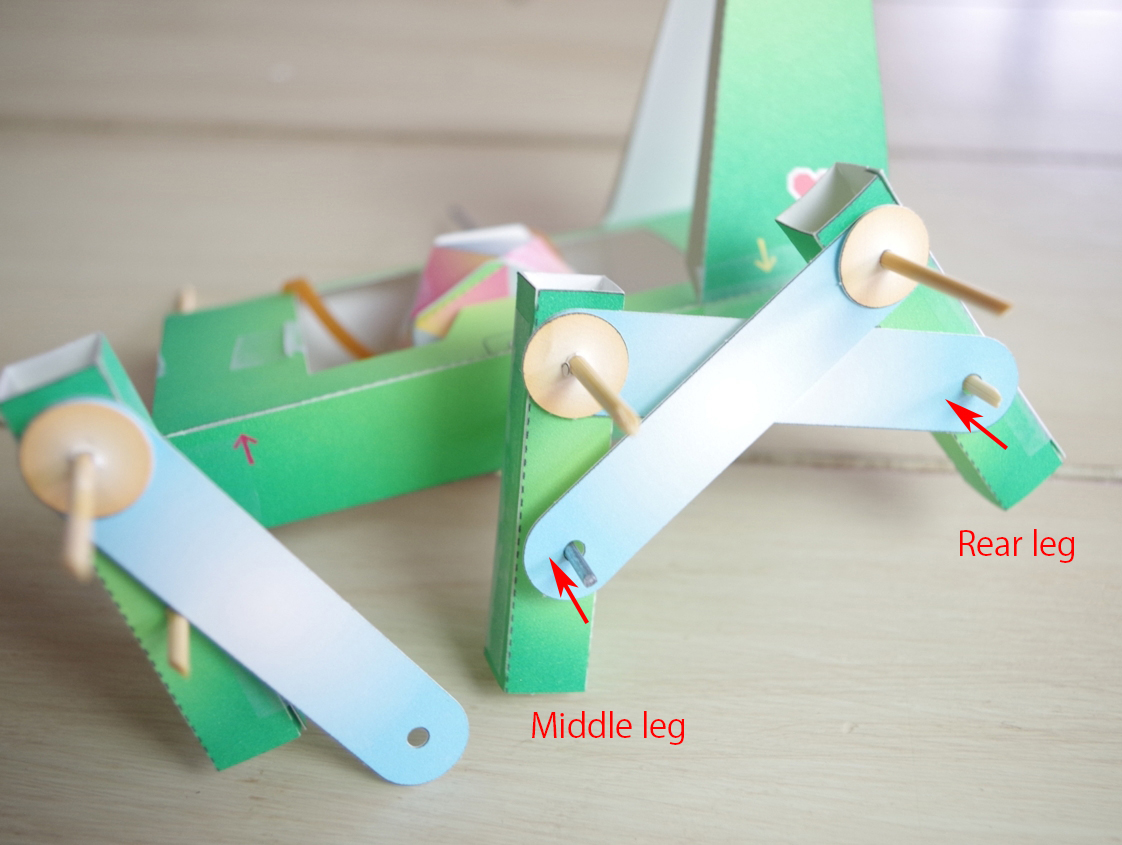
6. Install the middle and rear leg's links
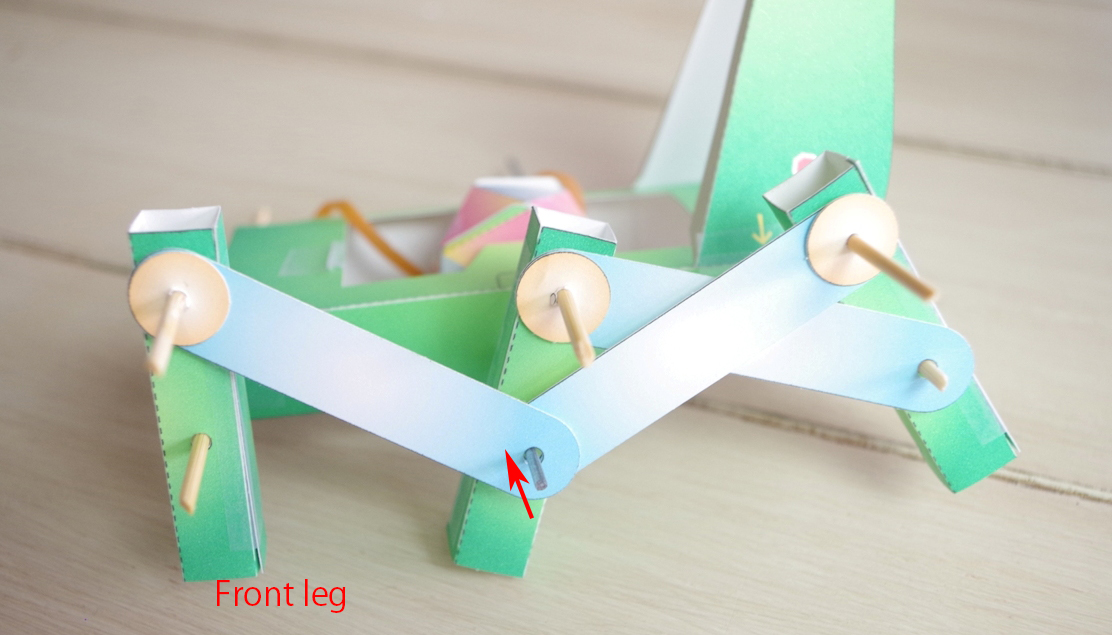
7. Install the front leg's link

8. Install D-3 to each axis
9. Left side complete. Make the right side as same way.
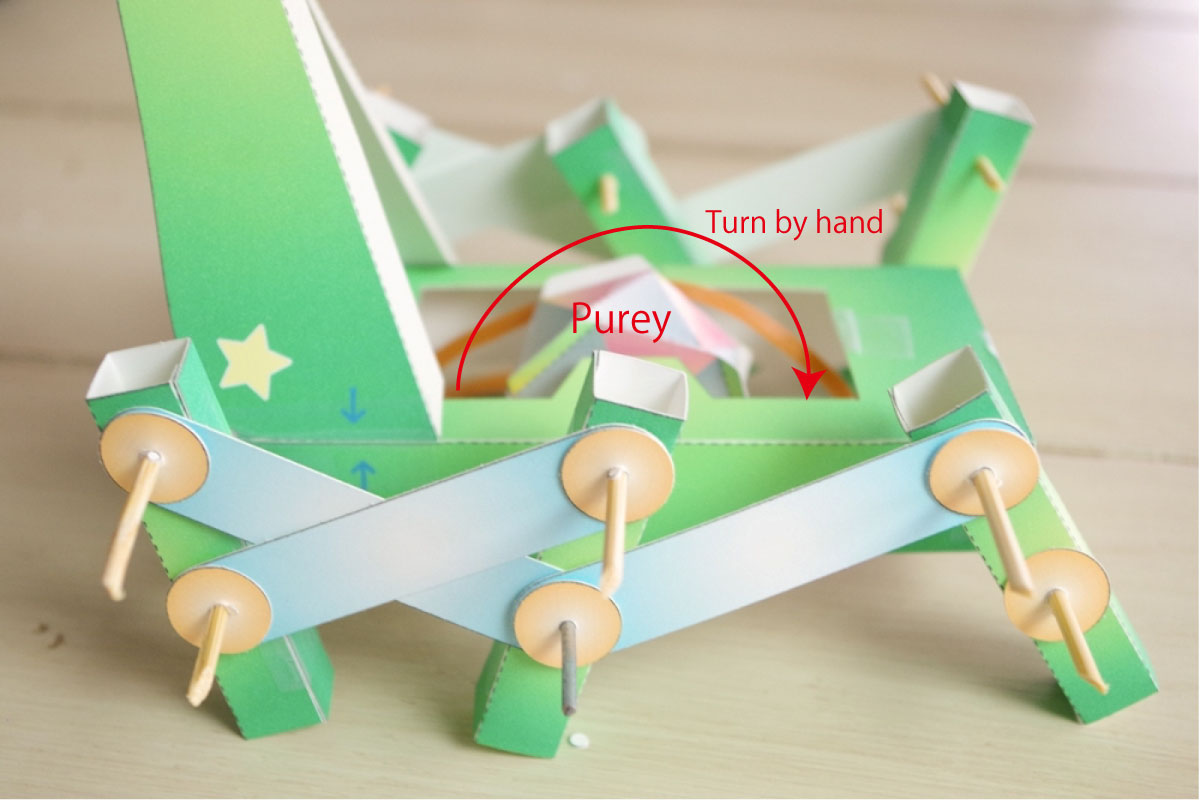
10. Turn the purey by hand and check it turns smoothly
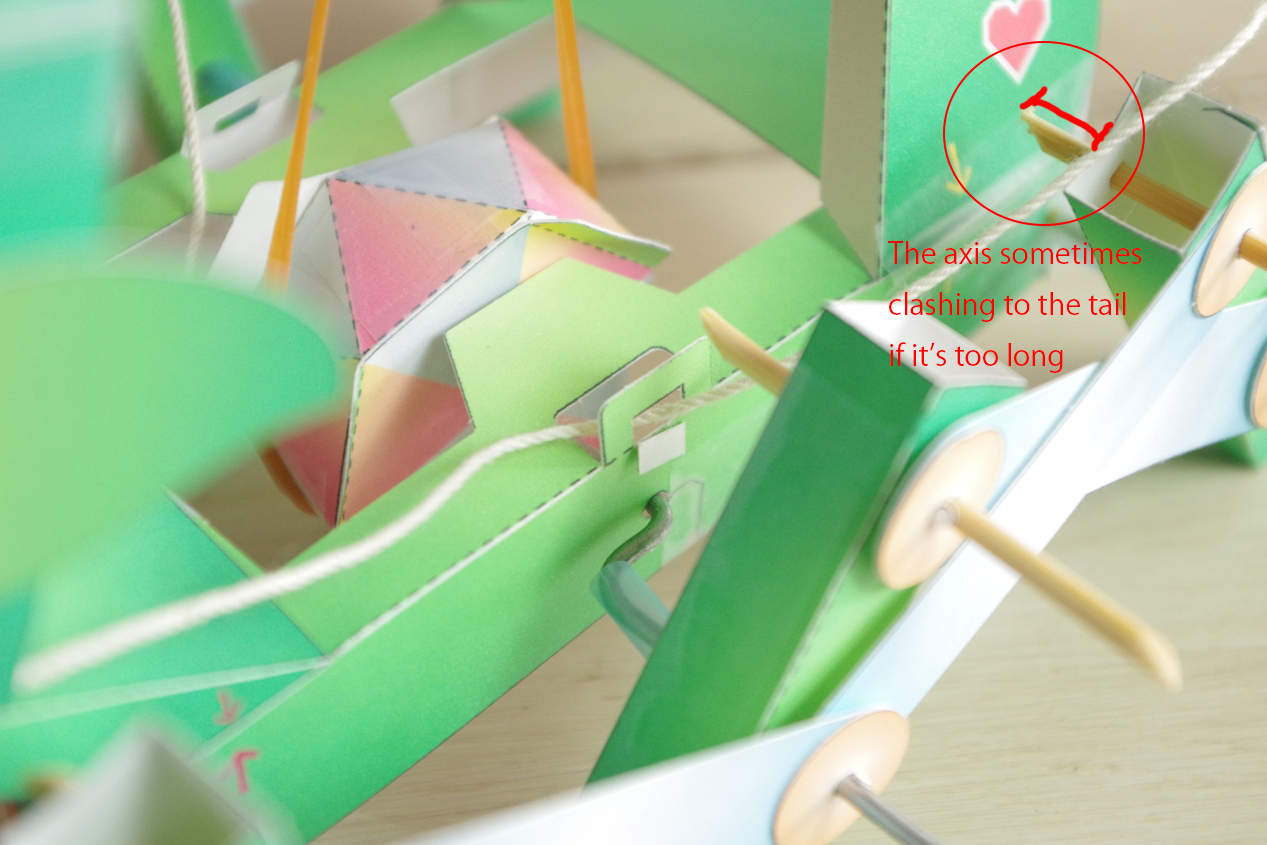
Check the rear leg's upper axis is not clashing
11. Slinging rubber band and walking test
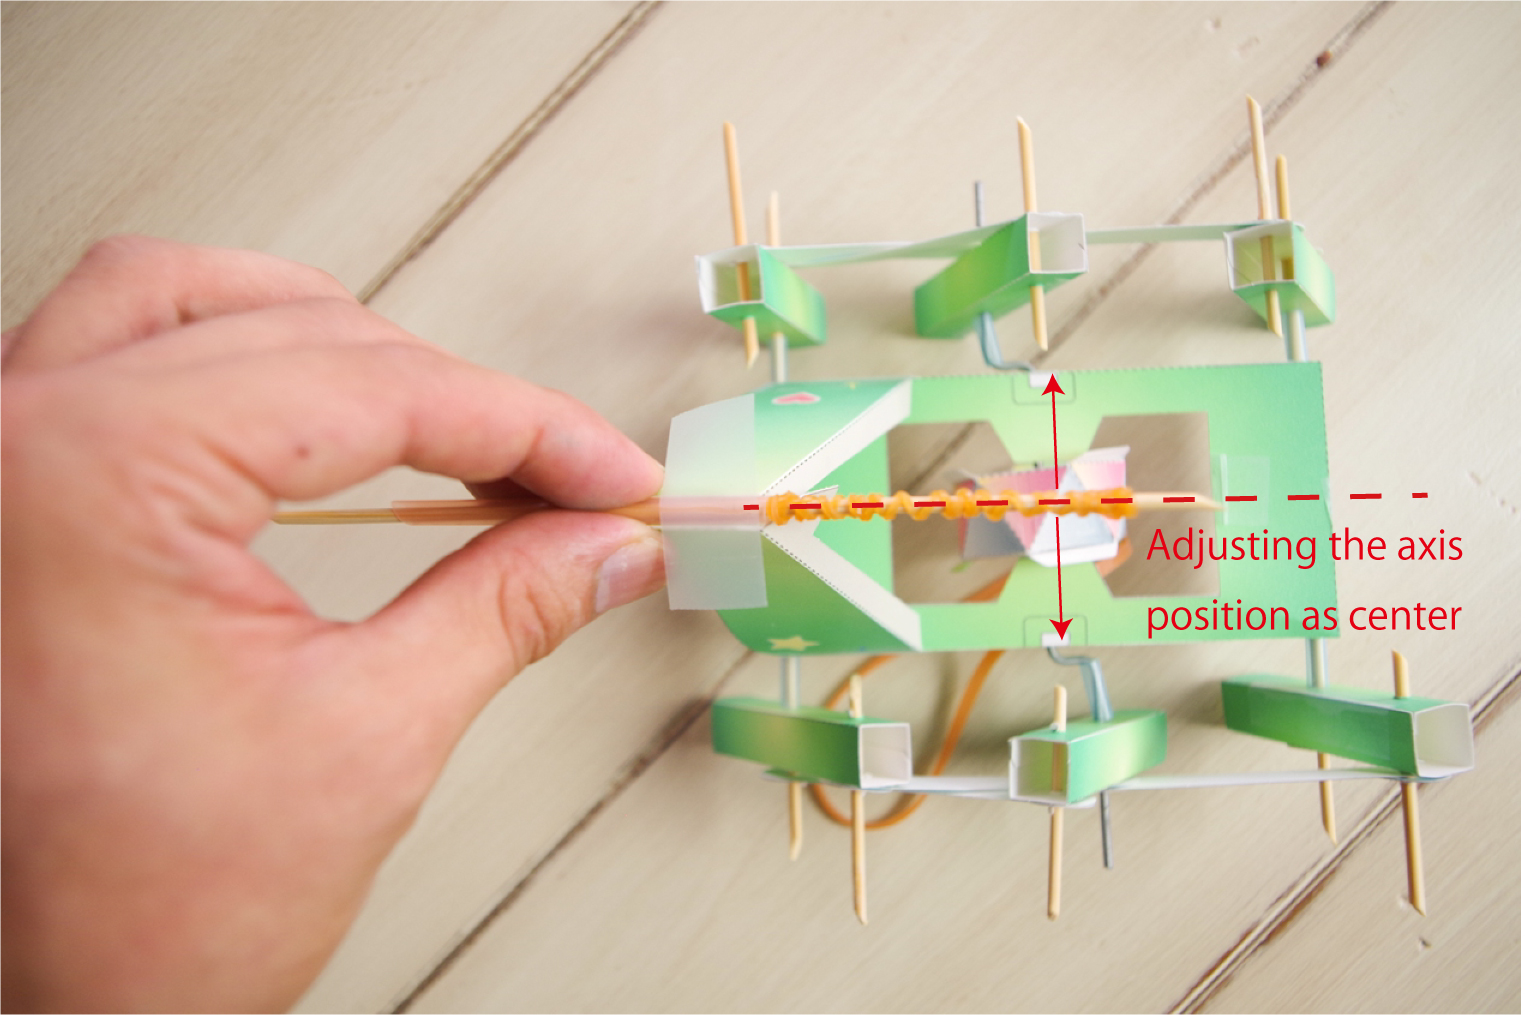
1. Please check again the axis position is center
2. Sling a rubber band(large) like this


Slinging way when walking toward the wind
Slinging way when walking to downwind.
It's okay as this way for now
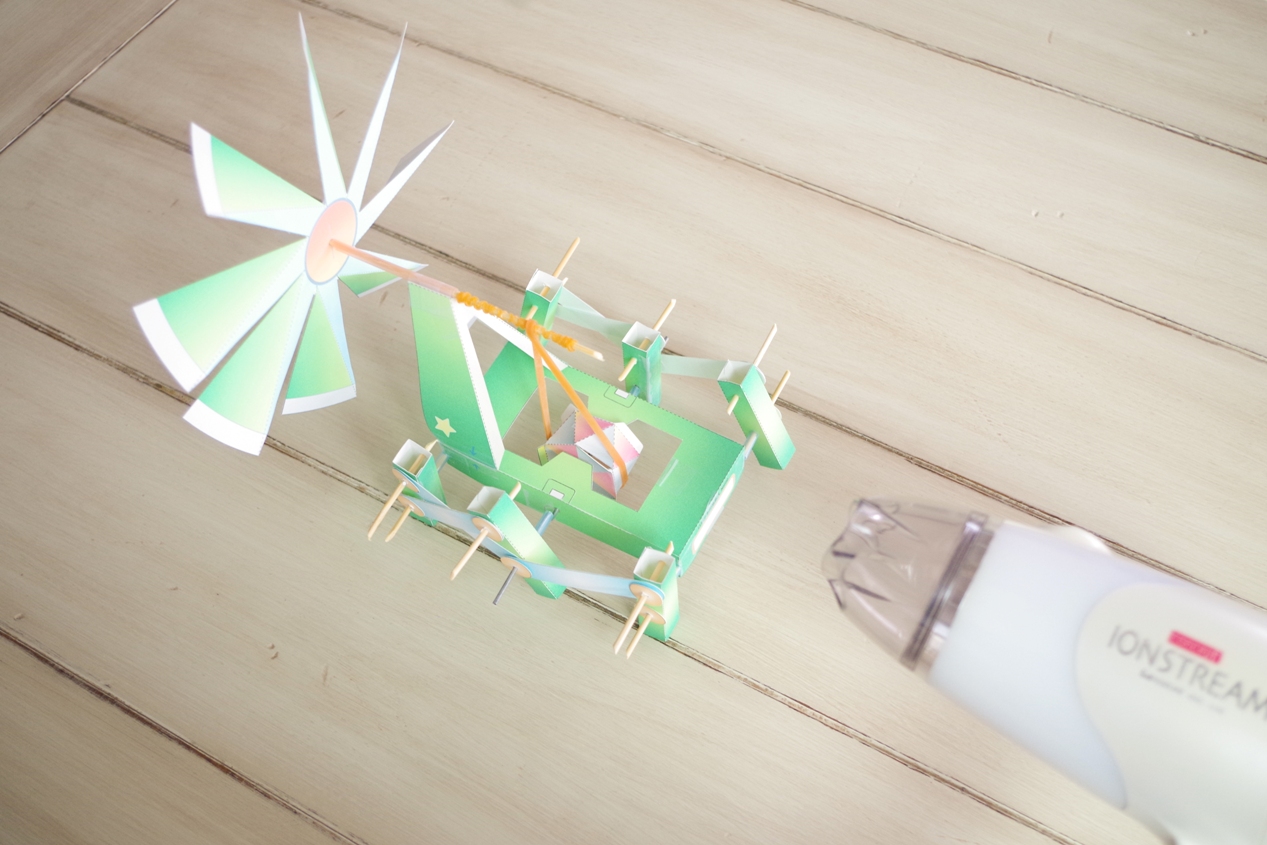
3. Test walking. Can walk ?
Trouble shooting
- Can not walk
Please turn the axis of wind mill by your hand and find there are problem or not.
Check the rear leg's upper axis is not clashing
Check the both side axis is like this
Check the folding angle of the wind mill is suitable like this. Please don't fold too rapid angle.
- Rubber band drops from purey
Check the position of the axis skewer of wind mill is center like this.
- Rubber band drops from axis
Check the slinging way is correct.
Adjust the rubber band to more tight like this.
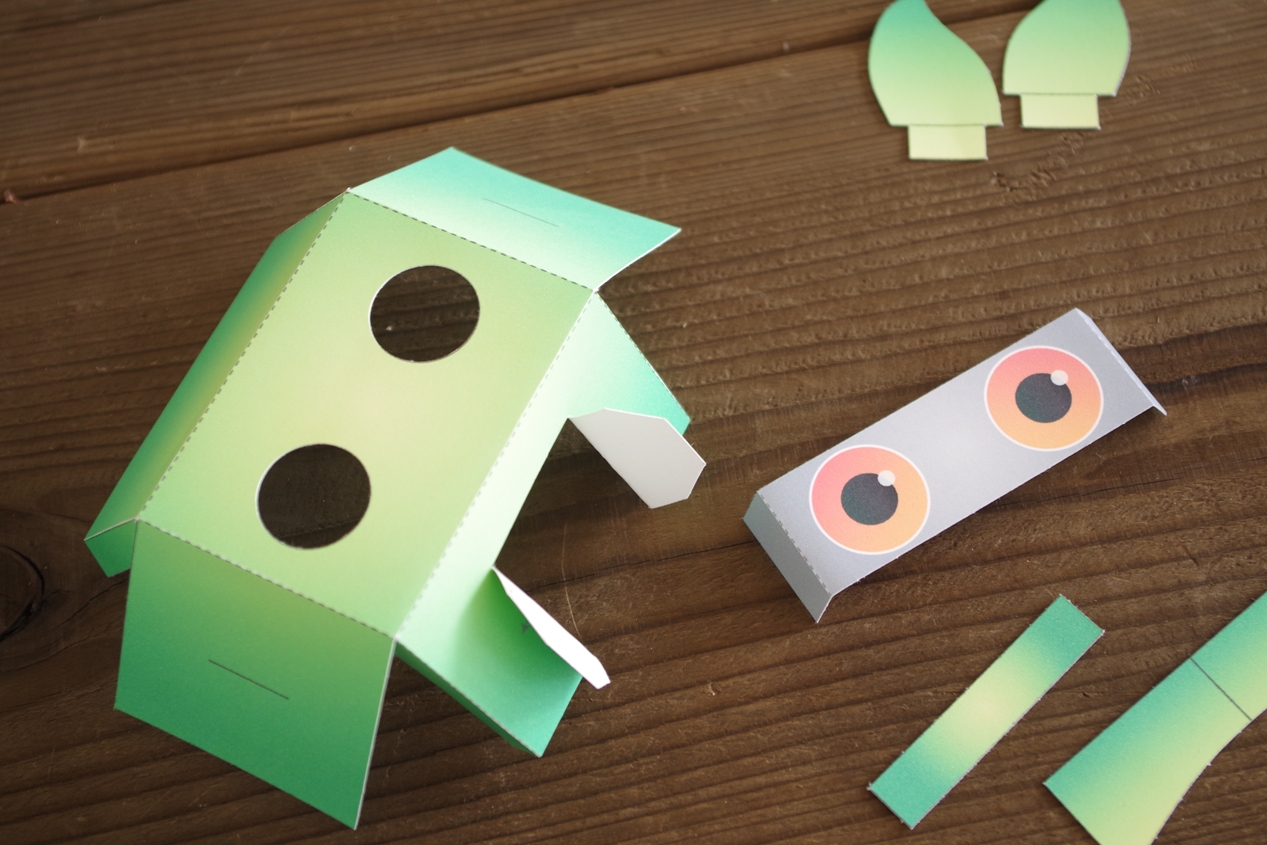
12. Making head (if the paper C version is r3)
We printed eyes to face already for making easy from version r3
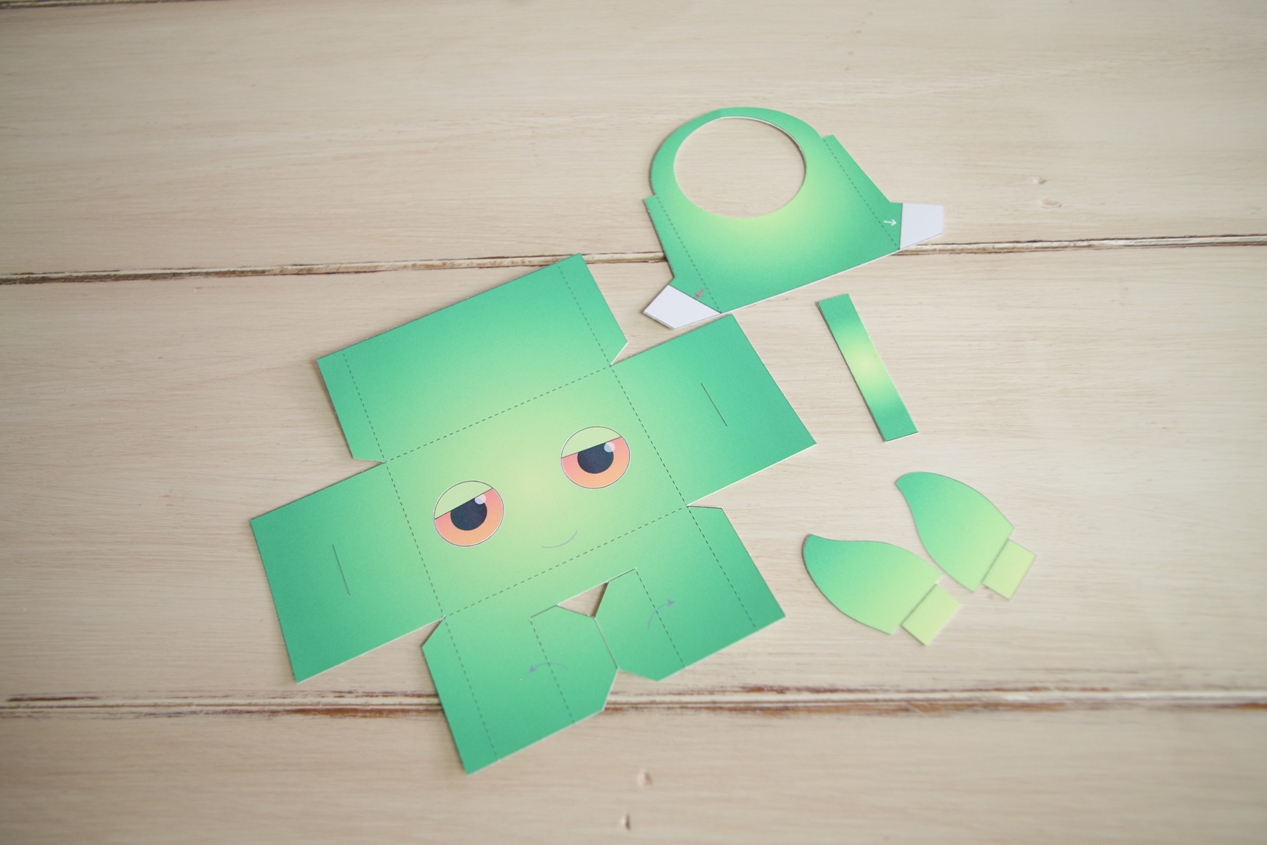
1. Preparing
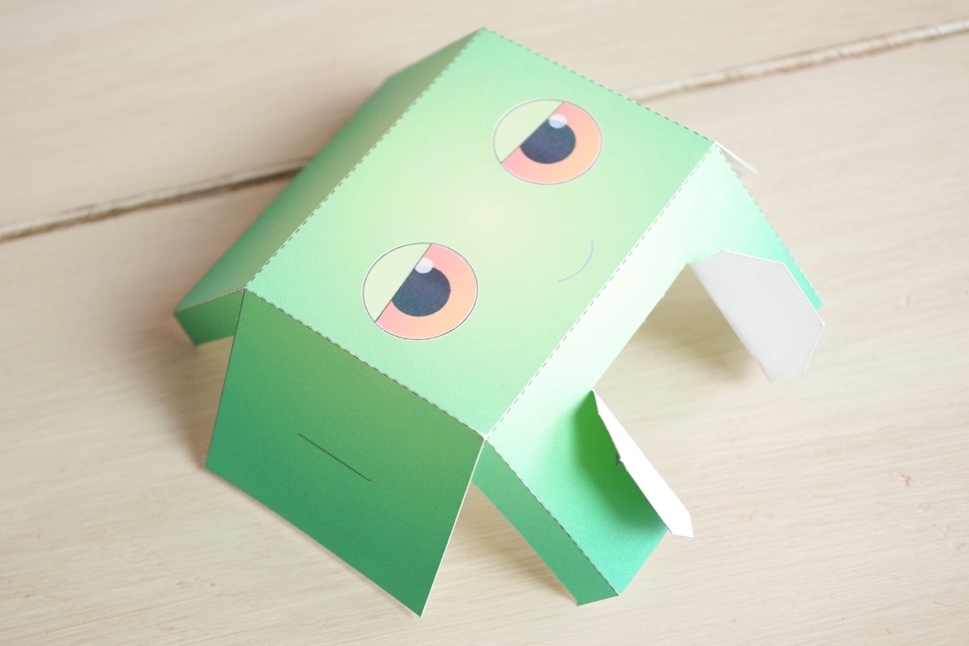
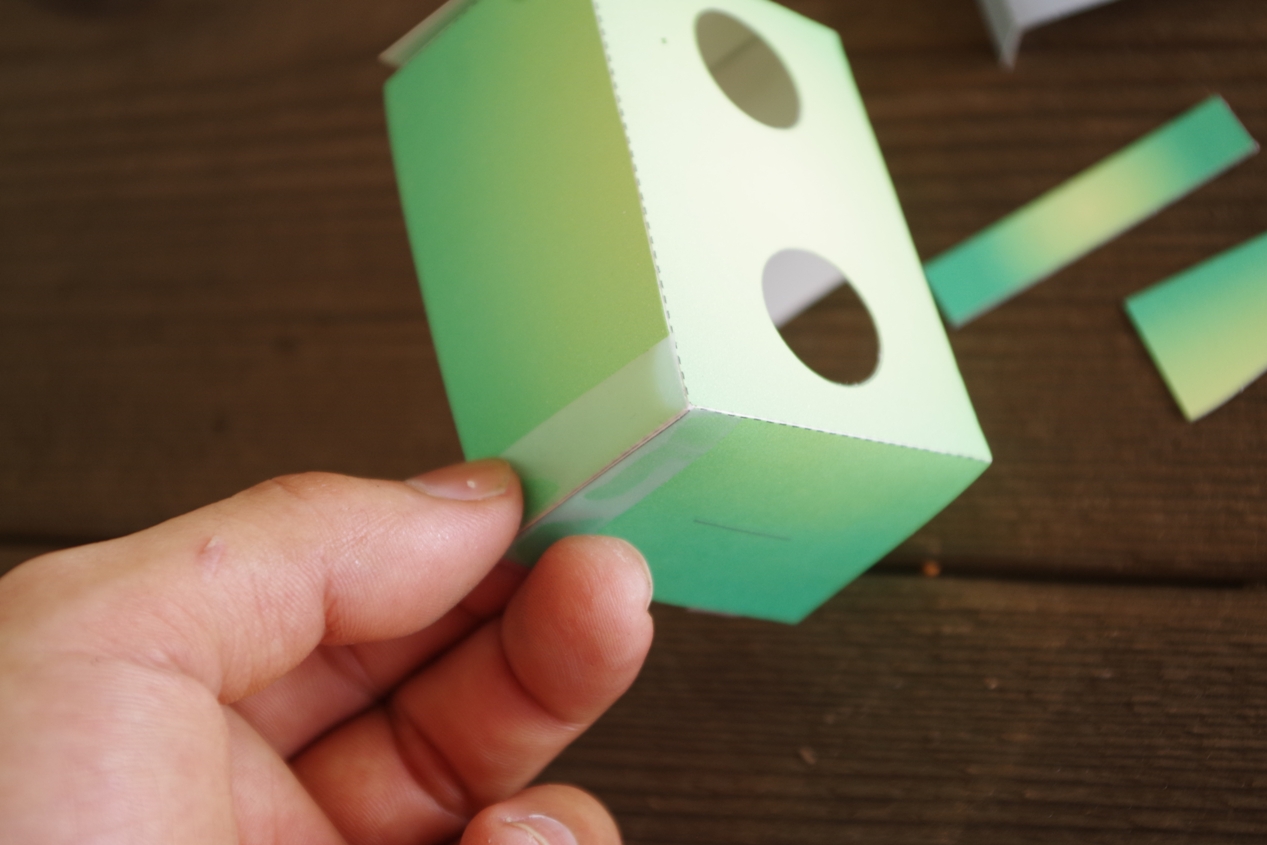
2. Fold like this
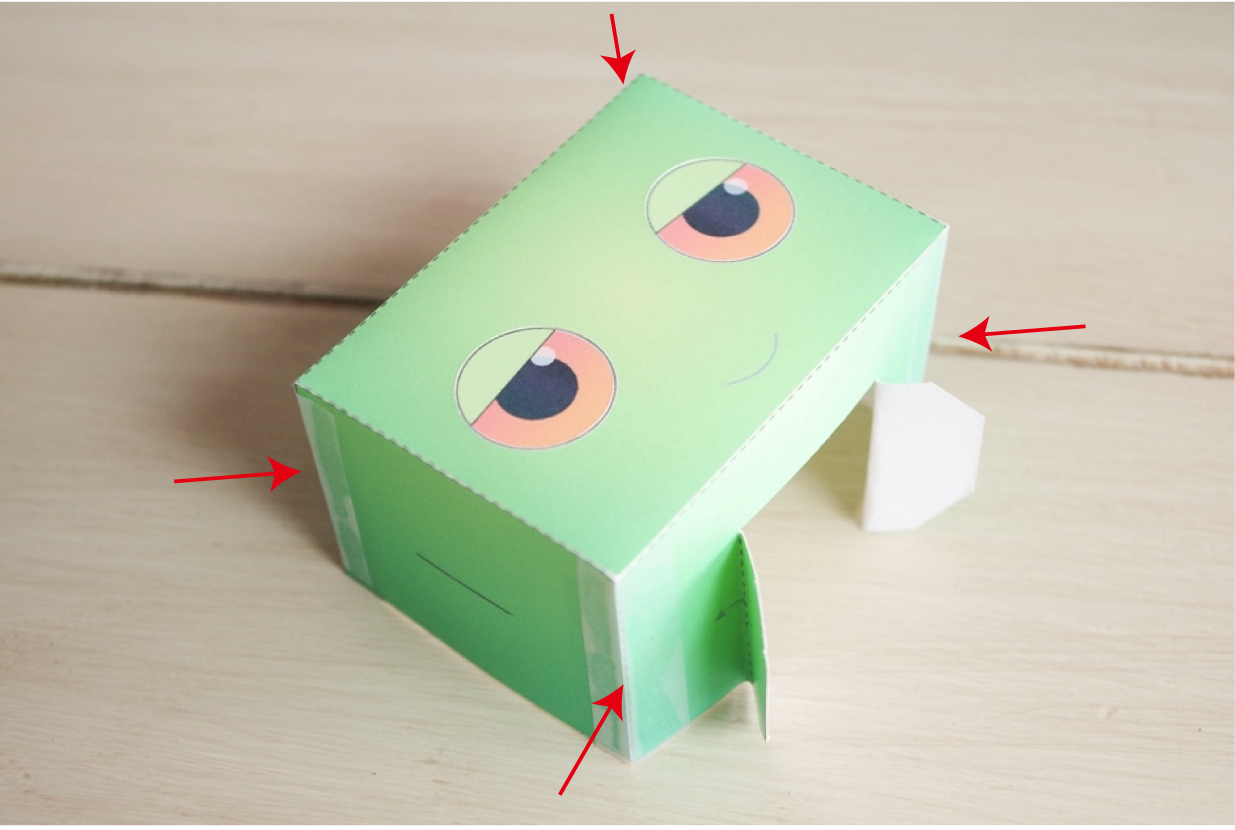
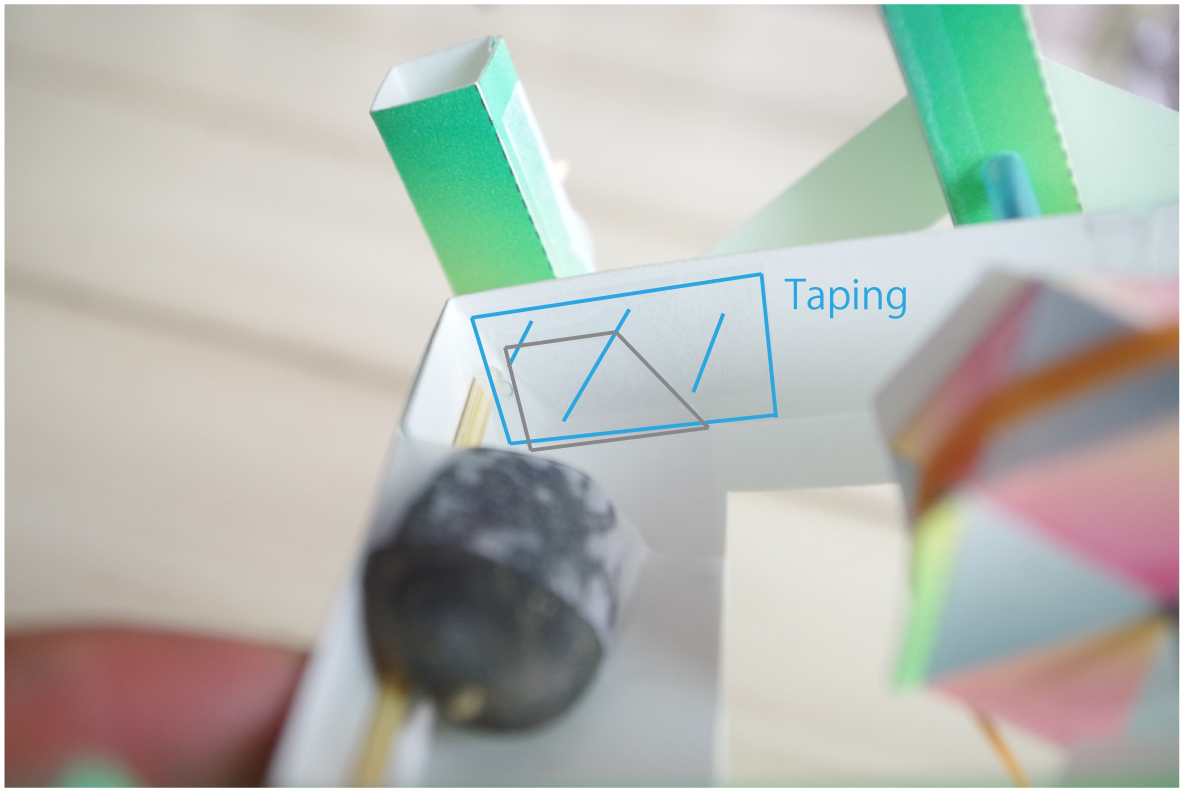
3. Taping each 4 corners
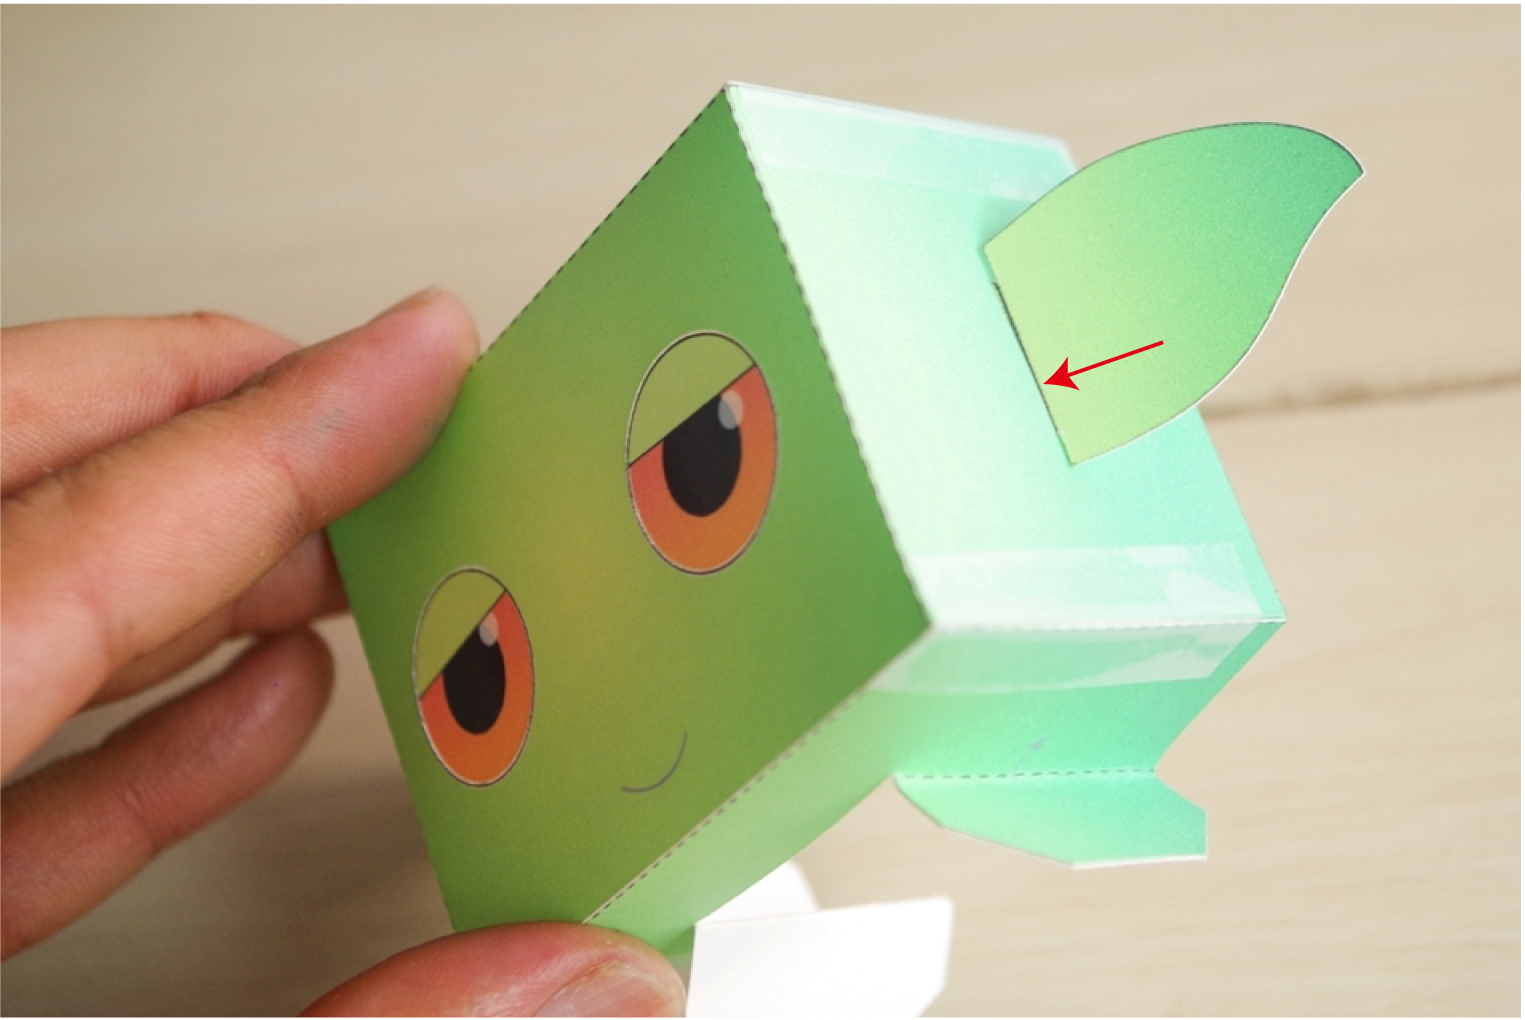
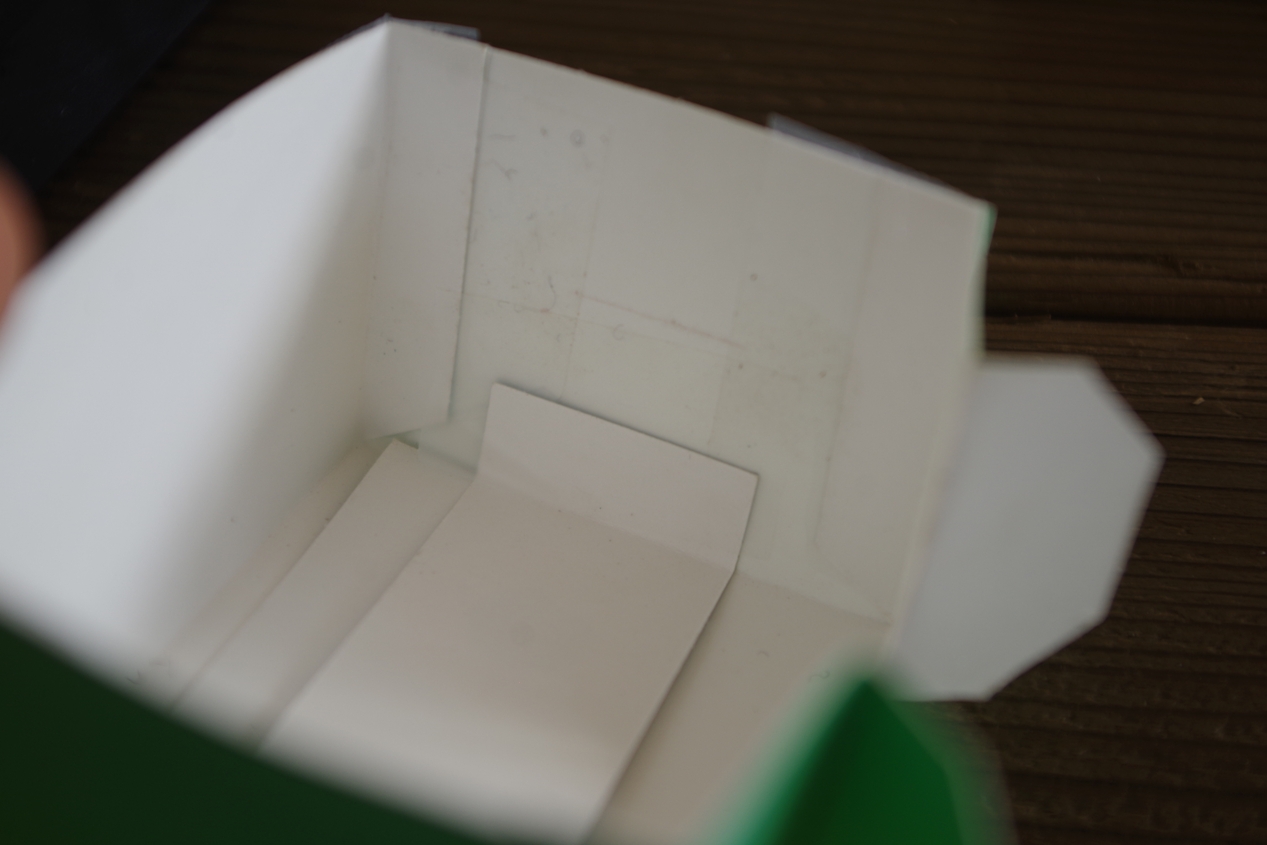
4. Put ears
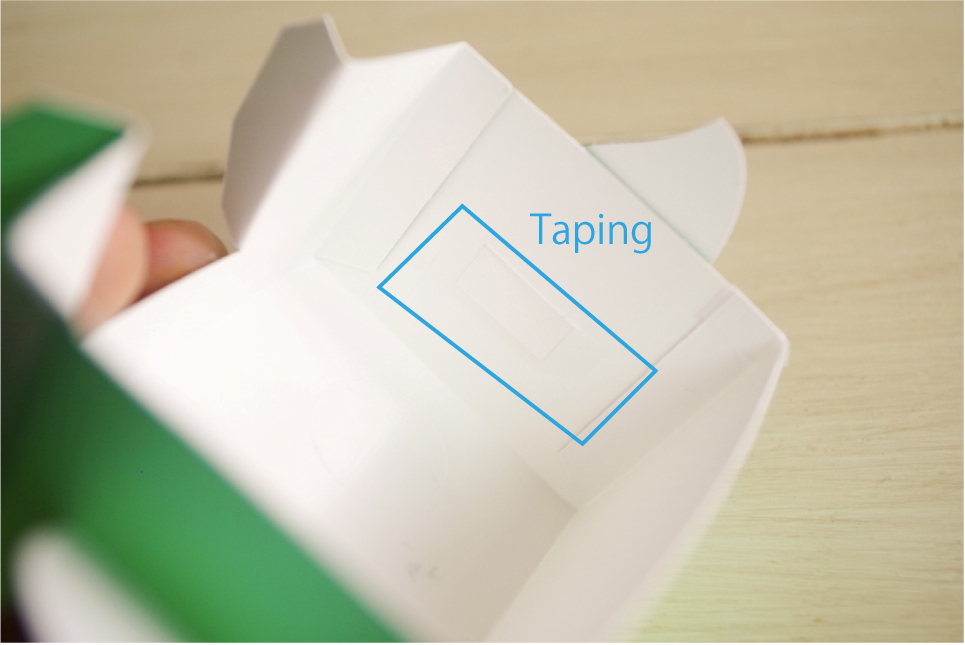

5. Tape ears from inside
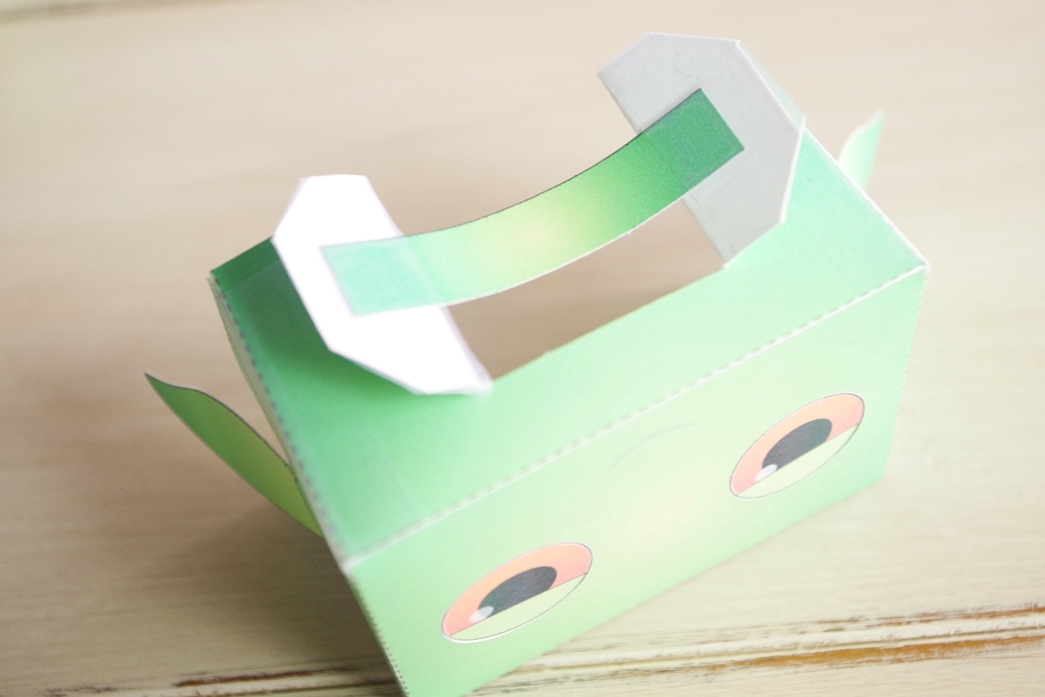
6. Tape B-3 like this
12. Making head (if the paper C version is under the r3)

1.Cut C-1, C-2, C-4, B-3, B-4, B-5
2. Fold C-4 and C-1 (select 1 type of eyes)

3. Tape inside corner of C-4
4. Tape outside corner of C-4
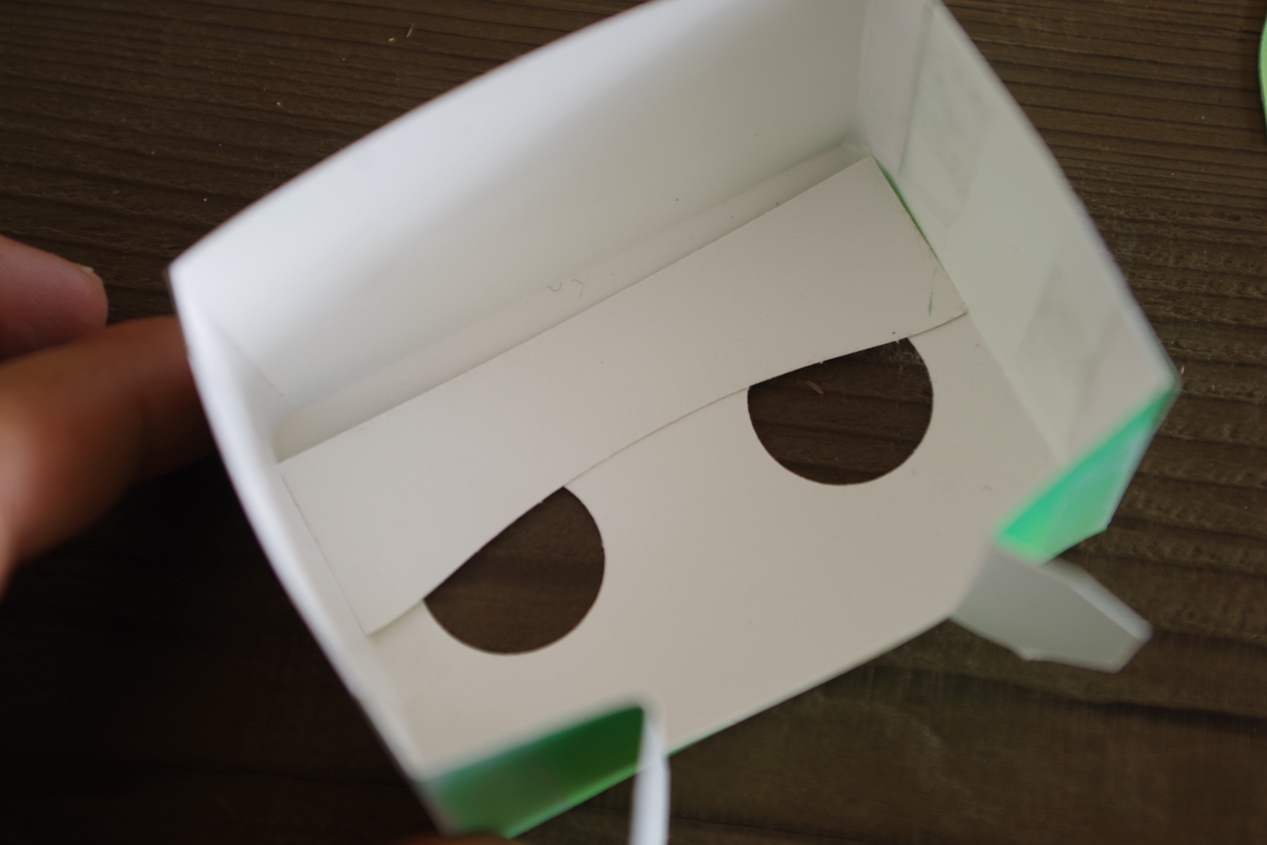
5. Put B-3
6. Put C-1
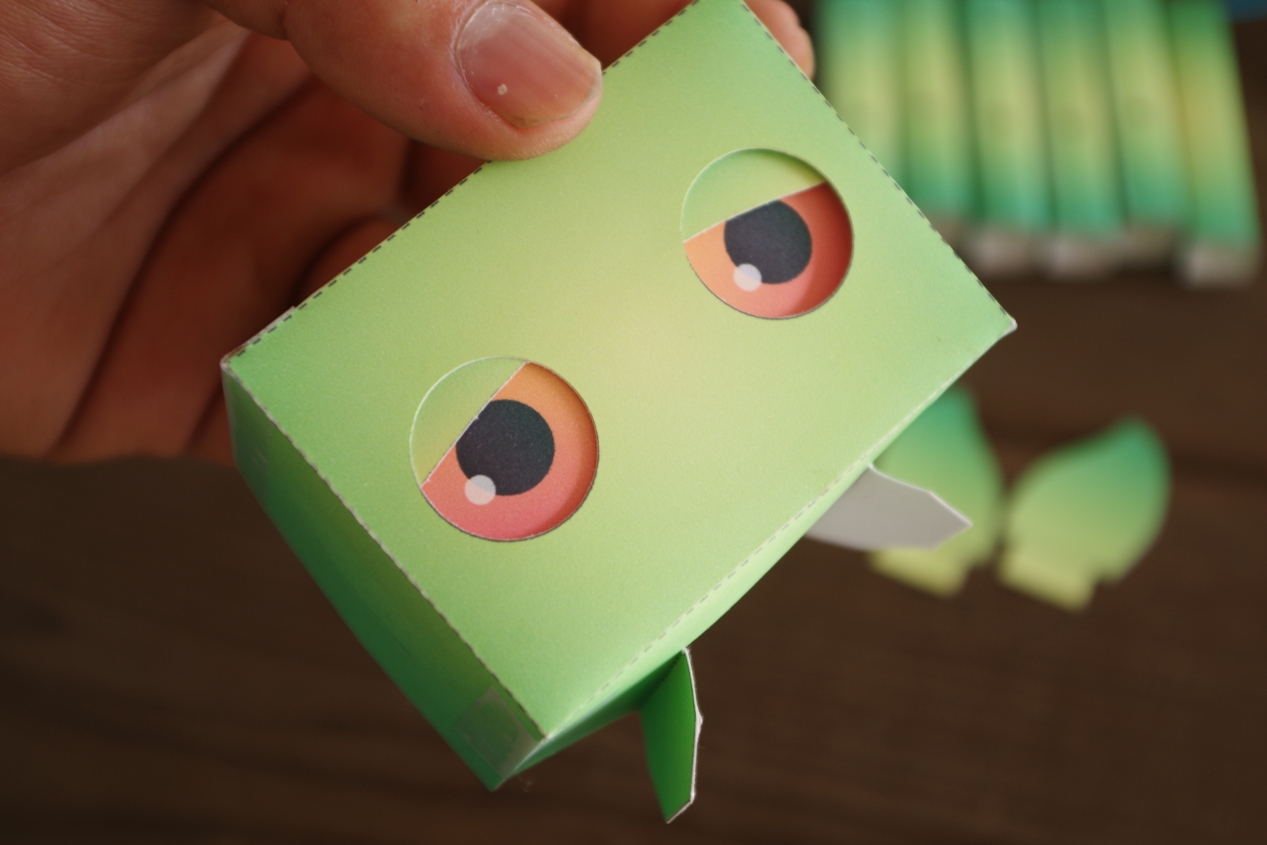
7. Adjust the position of C-1 to become like this
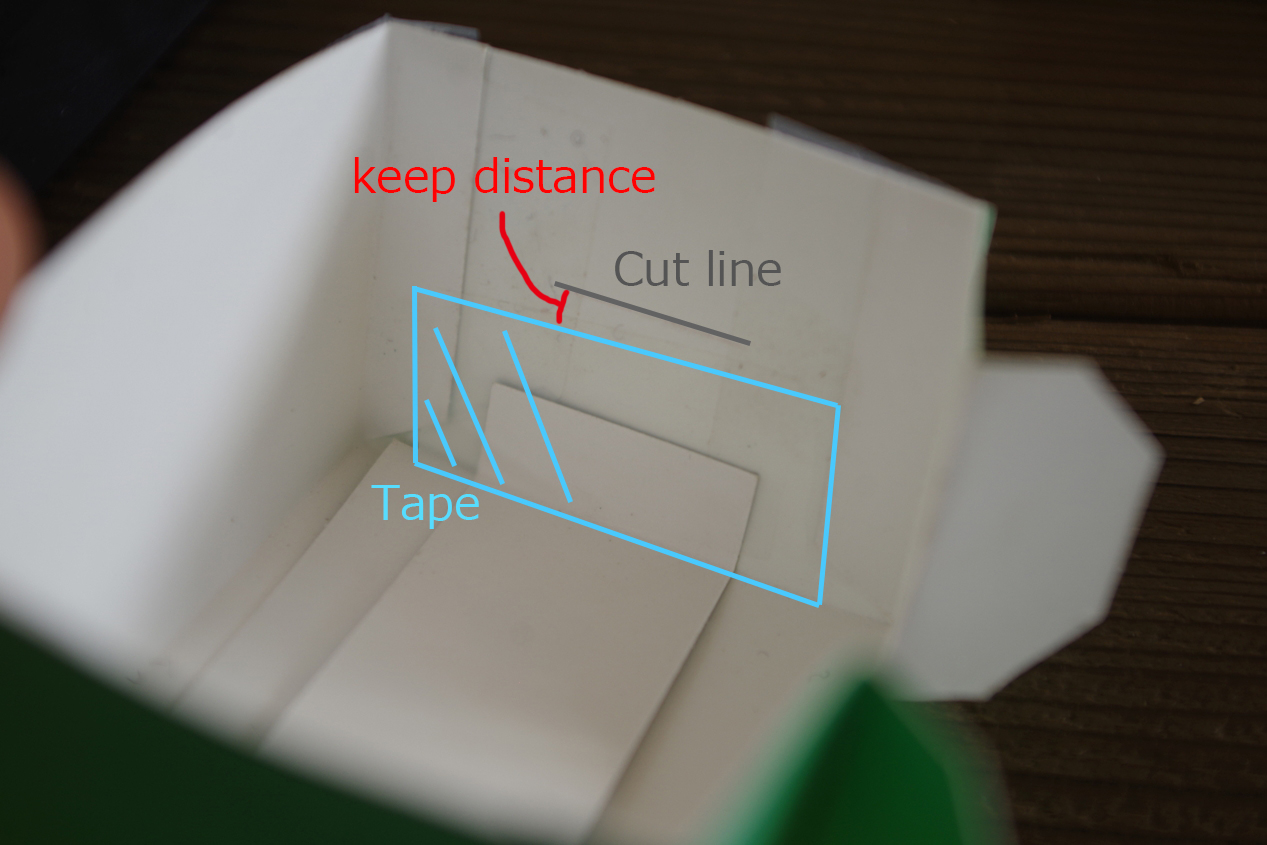
8. Tape C-1 (don't tape on the cut line)
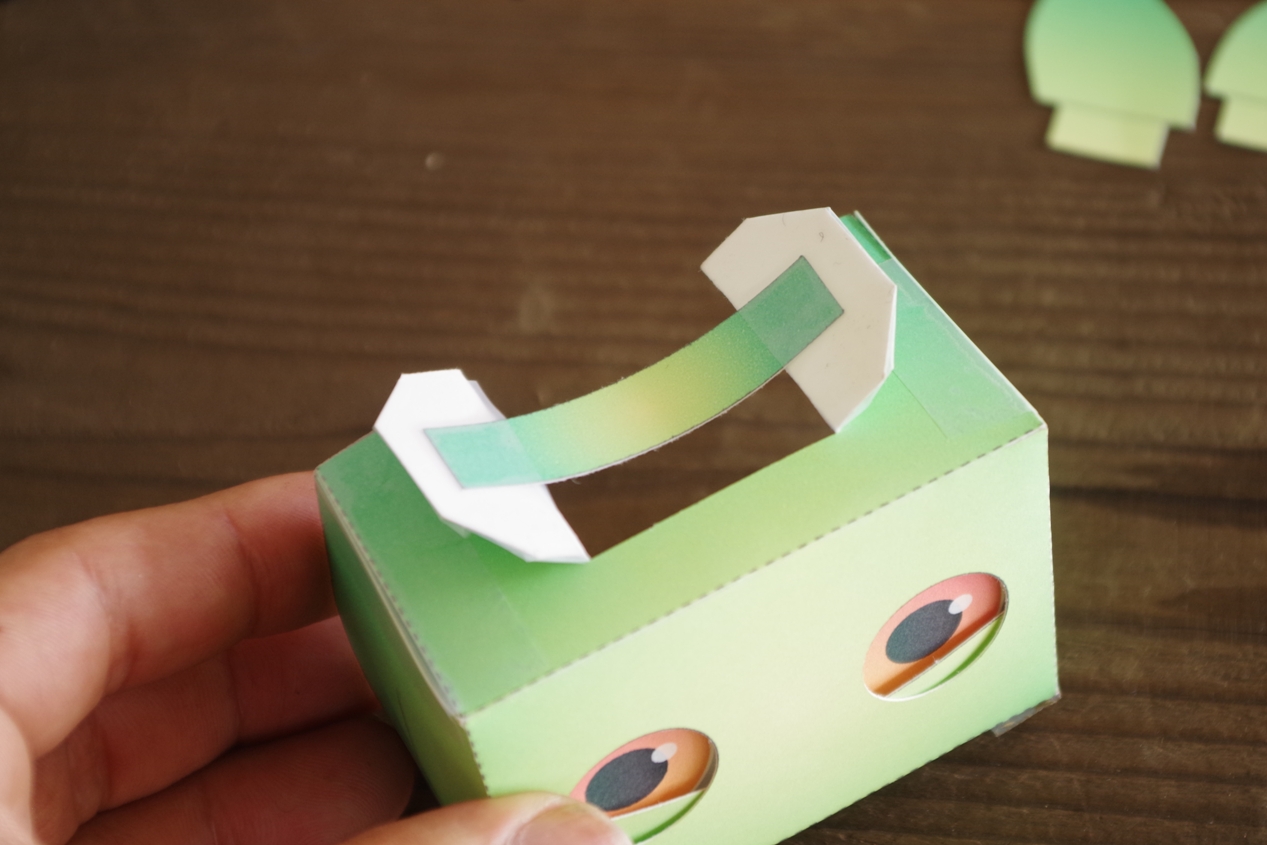

9. Tape B-3 like this
10. Insert ears to the cut line
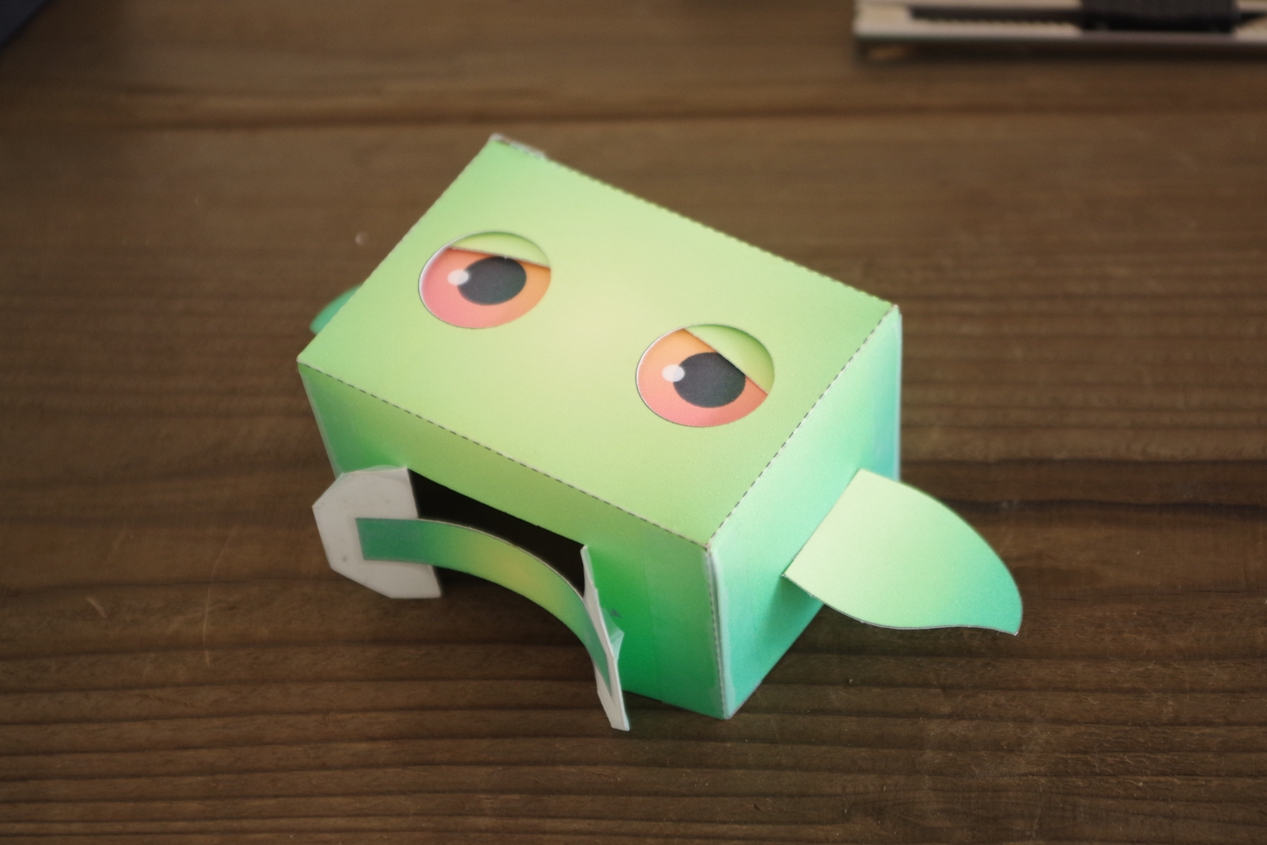
11. Complete !
13. Installing head
1. Fold head base (B-4)
2. Install head base to chasis
3. Taping head base from inside
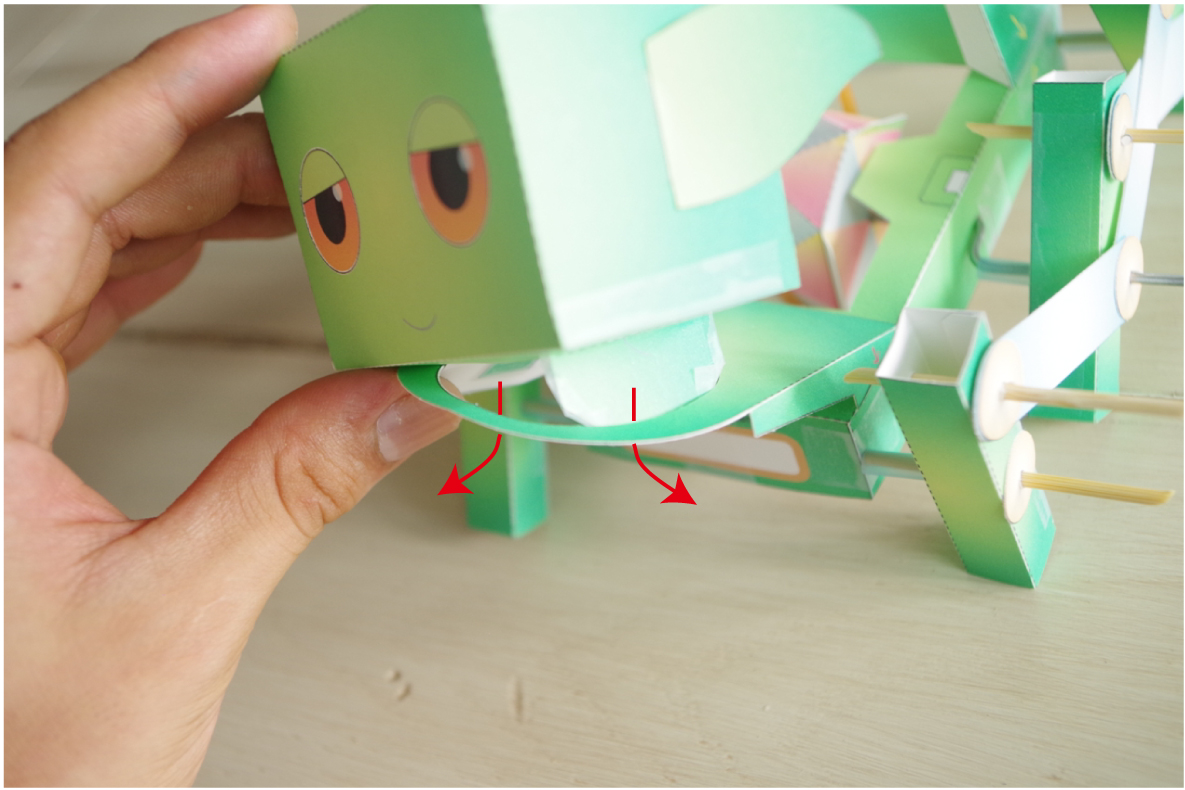
4. Install head to the head base
5. Complete !
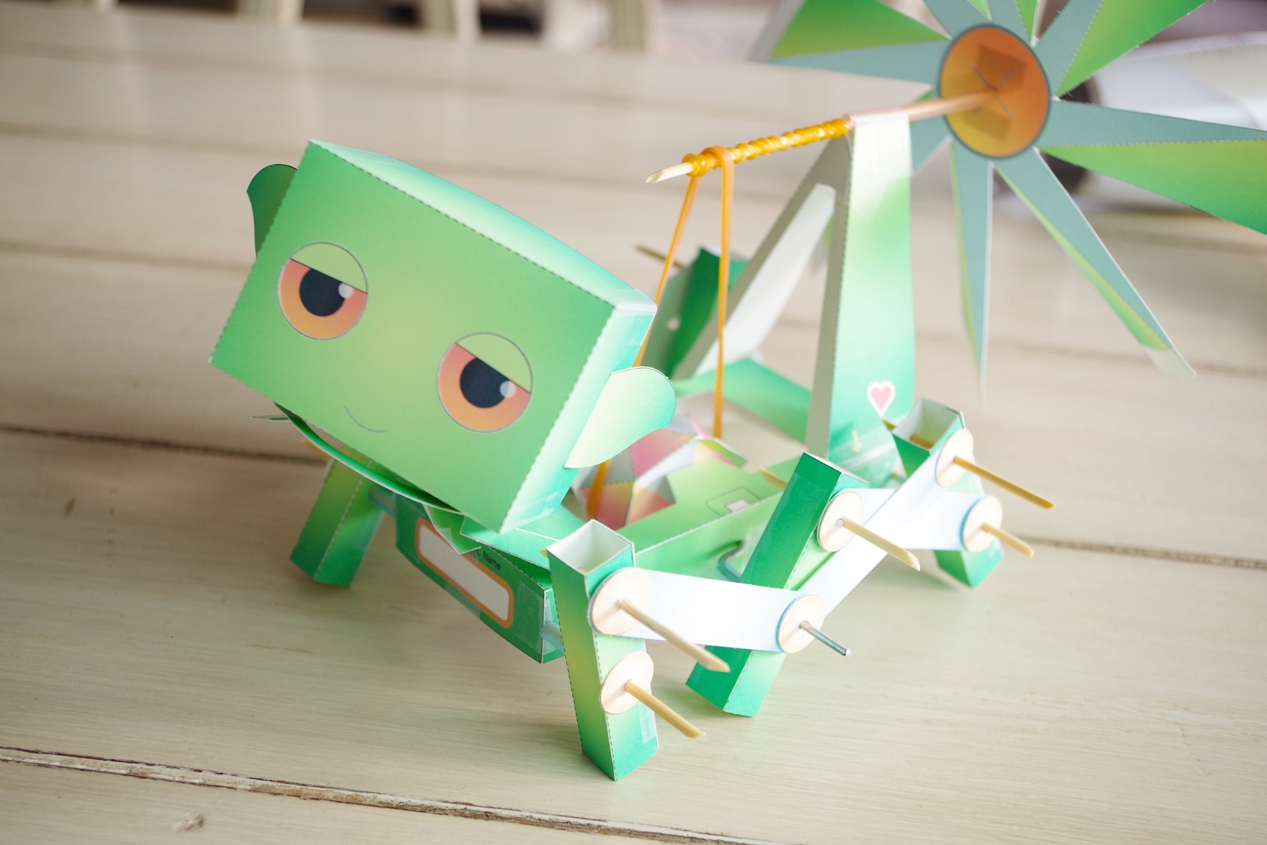
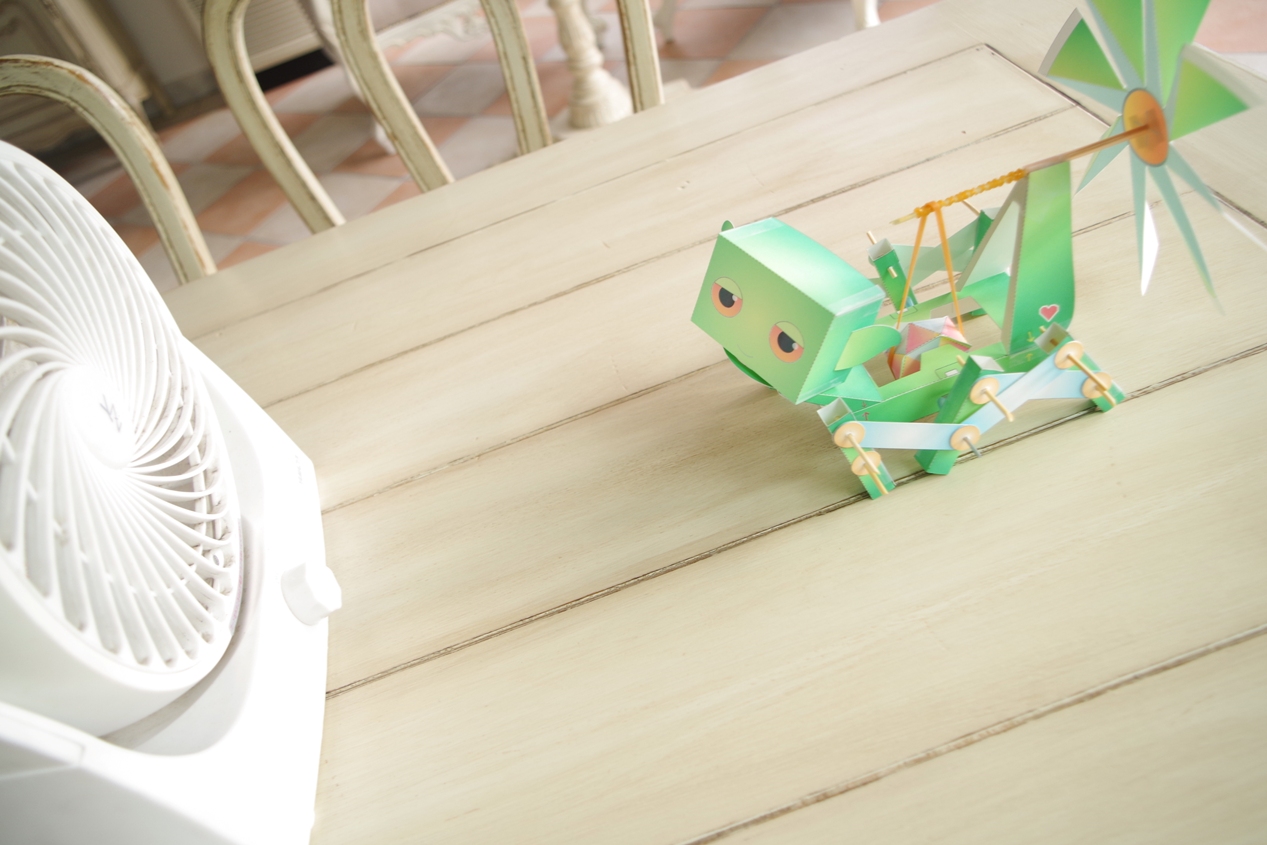
6. Let Craftel to walk
Craftel walking toward wind in this picture.
But please let walk to downwind at first time for easy to test it.
14. Additional function
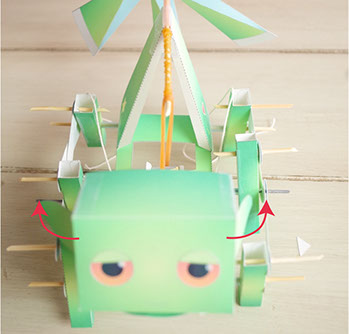
Craftel can move head automatically by using strings
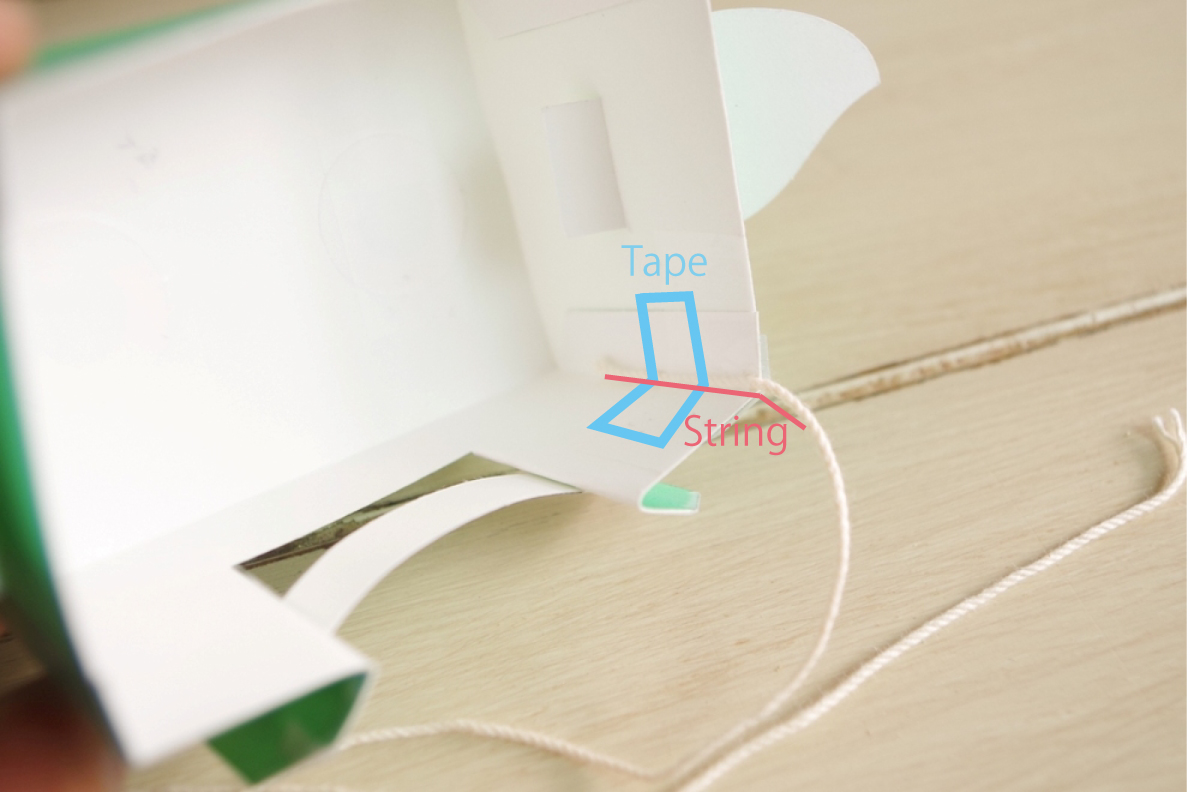
1. Tape the string to inside of the head


2. Tape strings to opposite side too
3. Put strings through the hole of the chasis
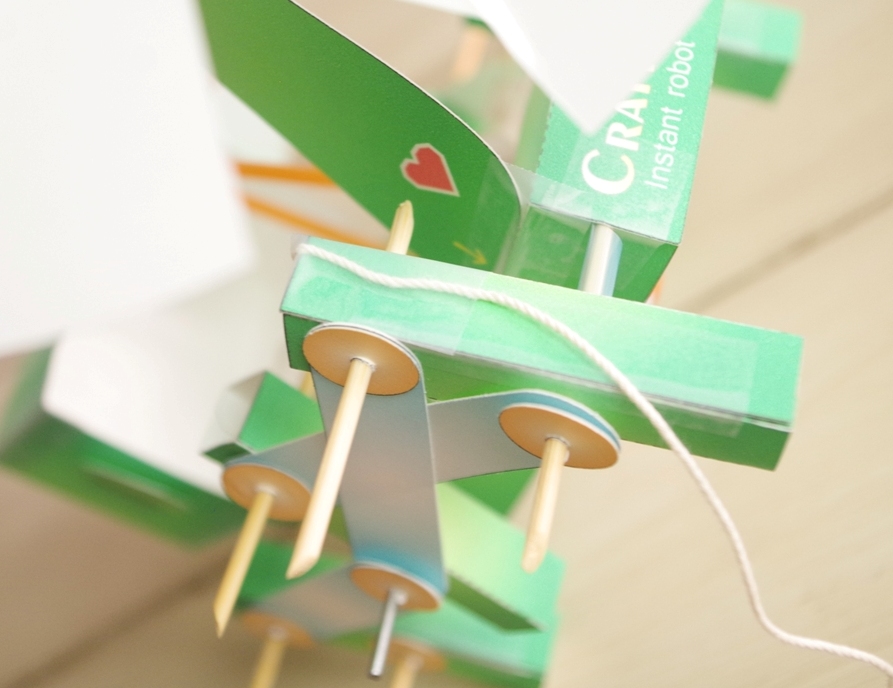
4. Tape strings to the back side of the rear leg
Make the oposite side as same
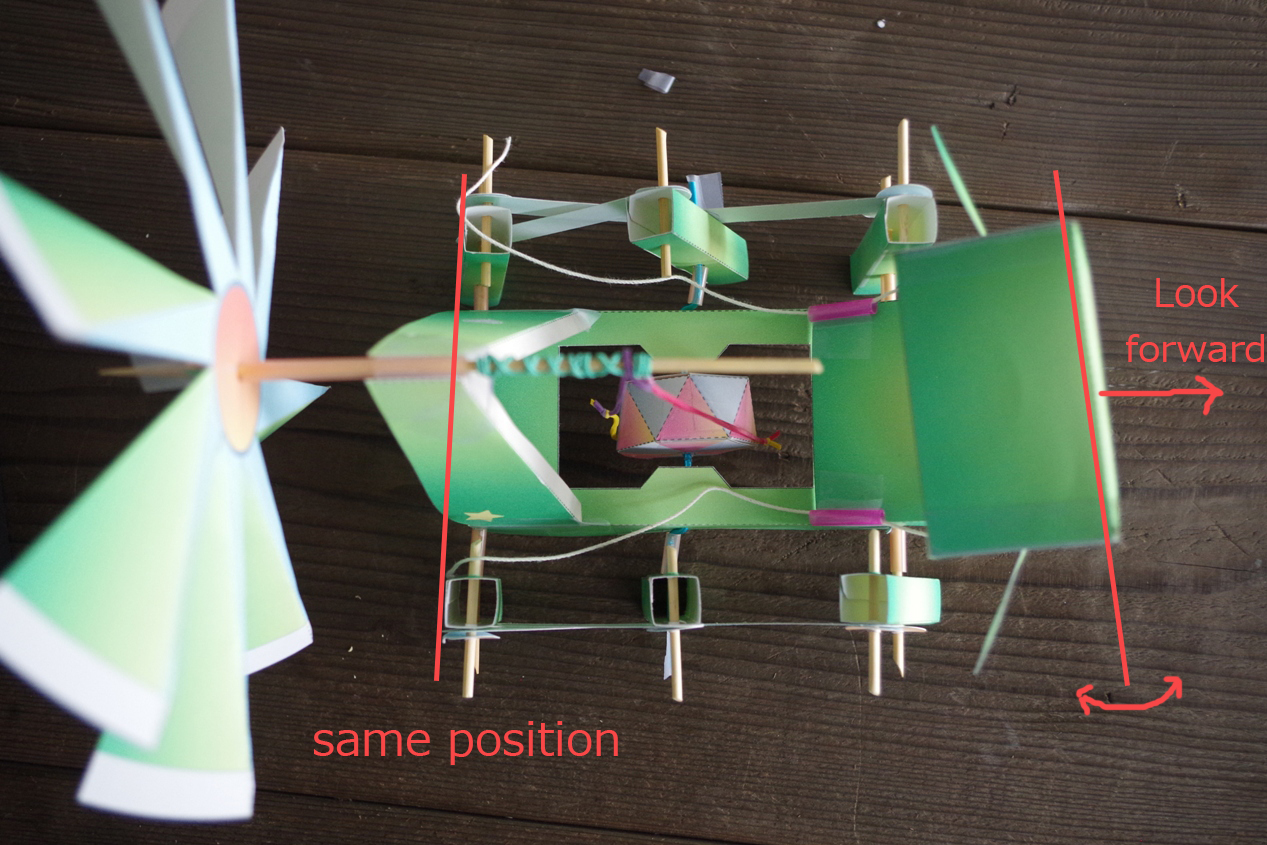

5. Adjusting the angle of the head to look forward. And turn wind mill to adjust the hind leg to the same position like the picture.
6. Tape the strings to the backward of the hind legs. The tension of the both strings should not be loose.
You may need adjusting the position of the strings with walking test.

That's all to make Craftel. If you have any question or have problem, please contact us.